Appearance
Device Configuration
Device configuration can be performed in two complementary ways:
- Individually, using managed settings (Fields from the Configuration category) defined per device
- In bulk, using Configuration Profiles, which act as reusable templates
Both approaches can be combined.
Example
If you manage hundreds of devices and need:
- The same firmware version
- The same Router App versions
- But a unique interface IP address per device
You can:
- Create a Configuration Profile containing all shared settings.
- Create a Unique Setting Value Field for the interface IP address.
Assigning a Configuration Profile
Create a dashboard view with a device table that includes columns for:
- Configuration Profile
- Unique Setting Value Field
Select multiple devices and apply the same Configuration Profile using the Batch Edit dialog.
Setting Unique Values
For settings that must differ per device (e.g. IP addresses):
- Export the device table to a CSV file.
- Edit the CSV file (for example, using Excel) and assign unique values per device.
- Import the updated CSV file back into WebAccess/DMP.
For each device, both the Configuration Profile values and Unique Setting Value Fields are tracked as managed (desired).
Unique Setting Value Fields always take precedence over Configuration Profile values.
You can review or adjust this per device on the Desired Configuration tab.
Configuration Profiles
Configuration Profiles are used to deploy router firmware, Router Apps, scripts, users, and settings to individual devices or to devices in bulk.
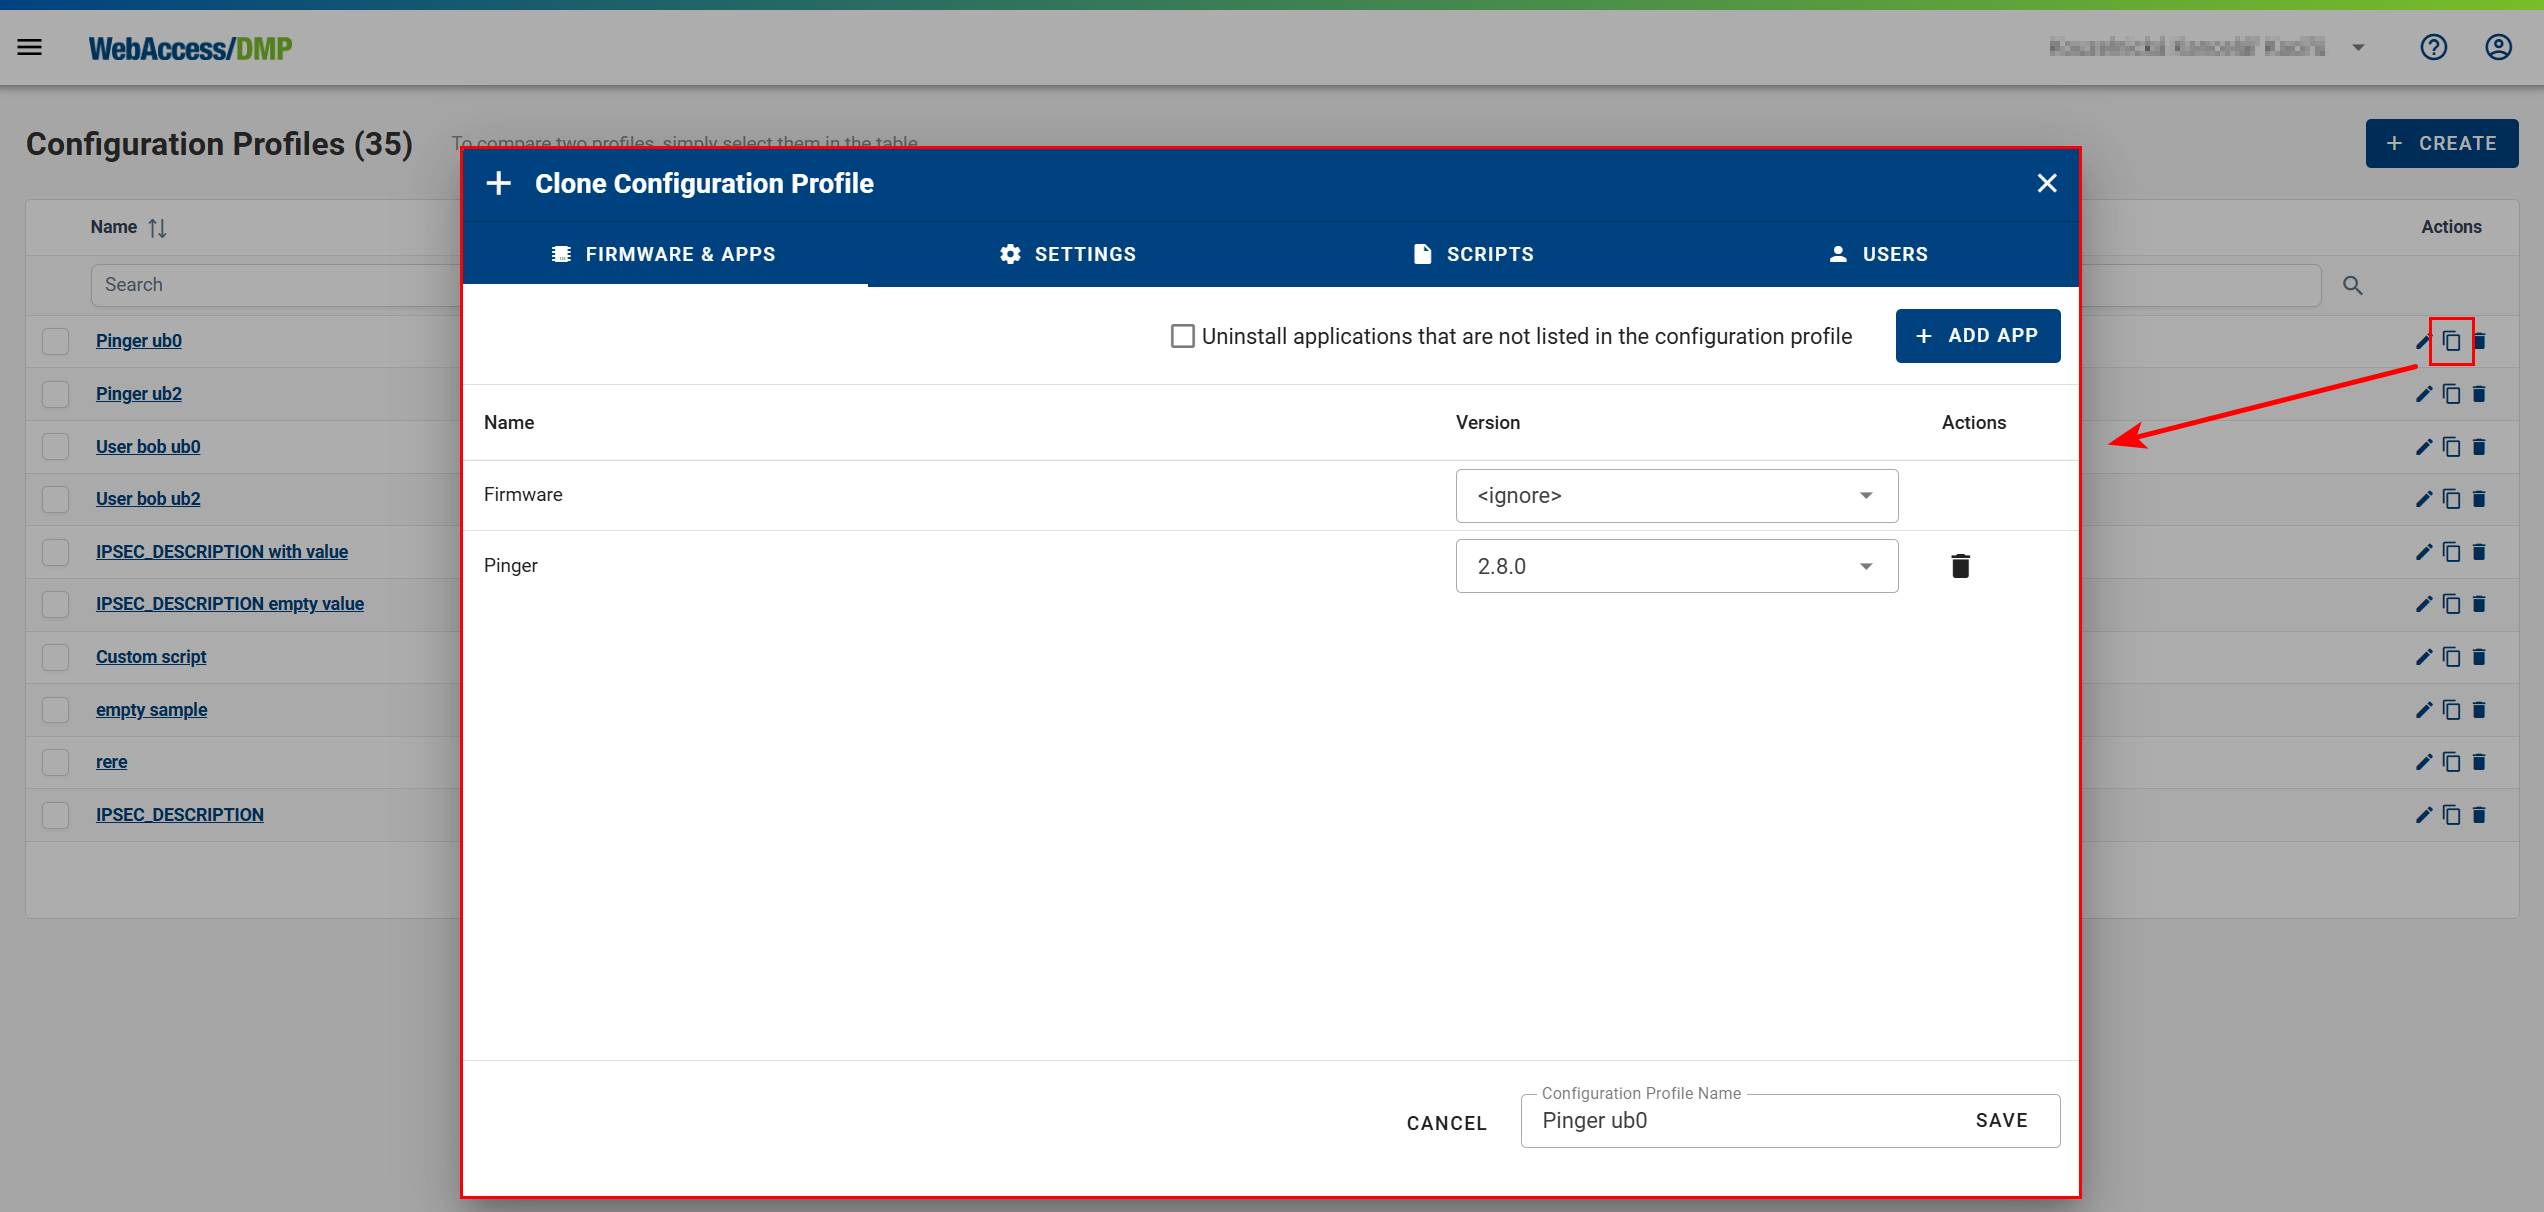
You can:
- Create a profile from scratch
- Clone an existing profile
- Create a profile as a snapshot of an existing device
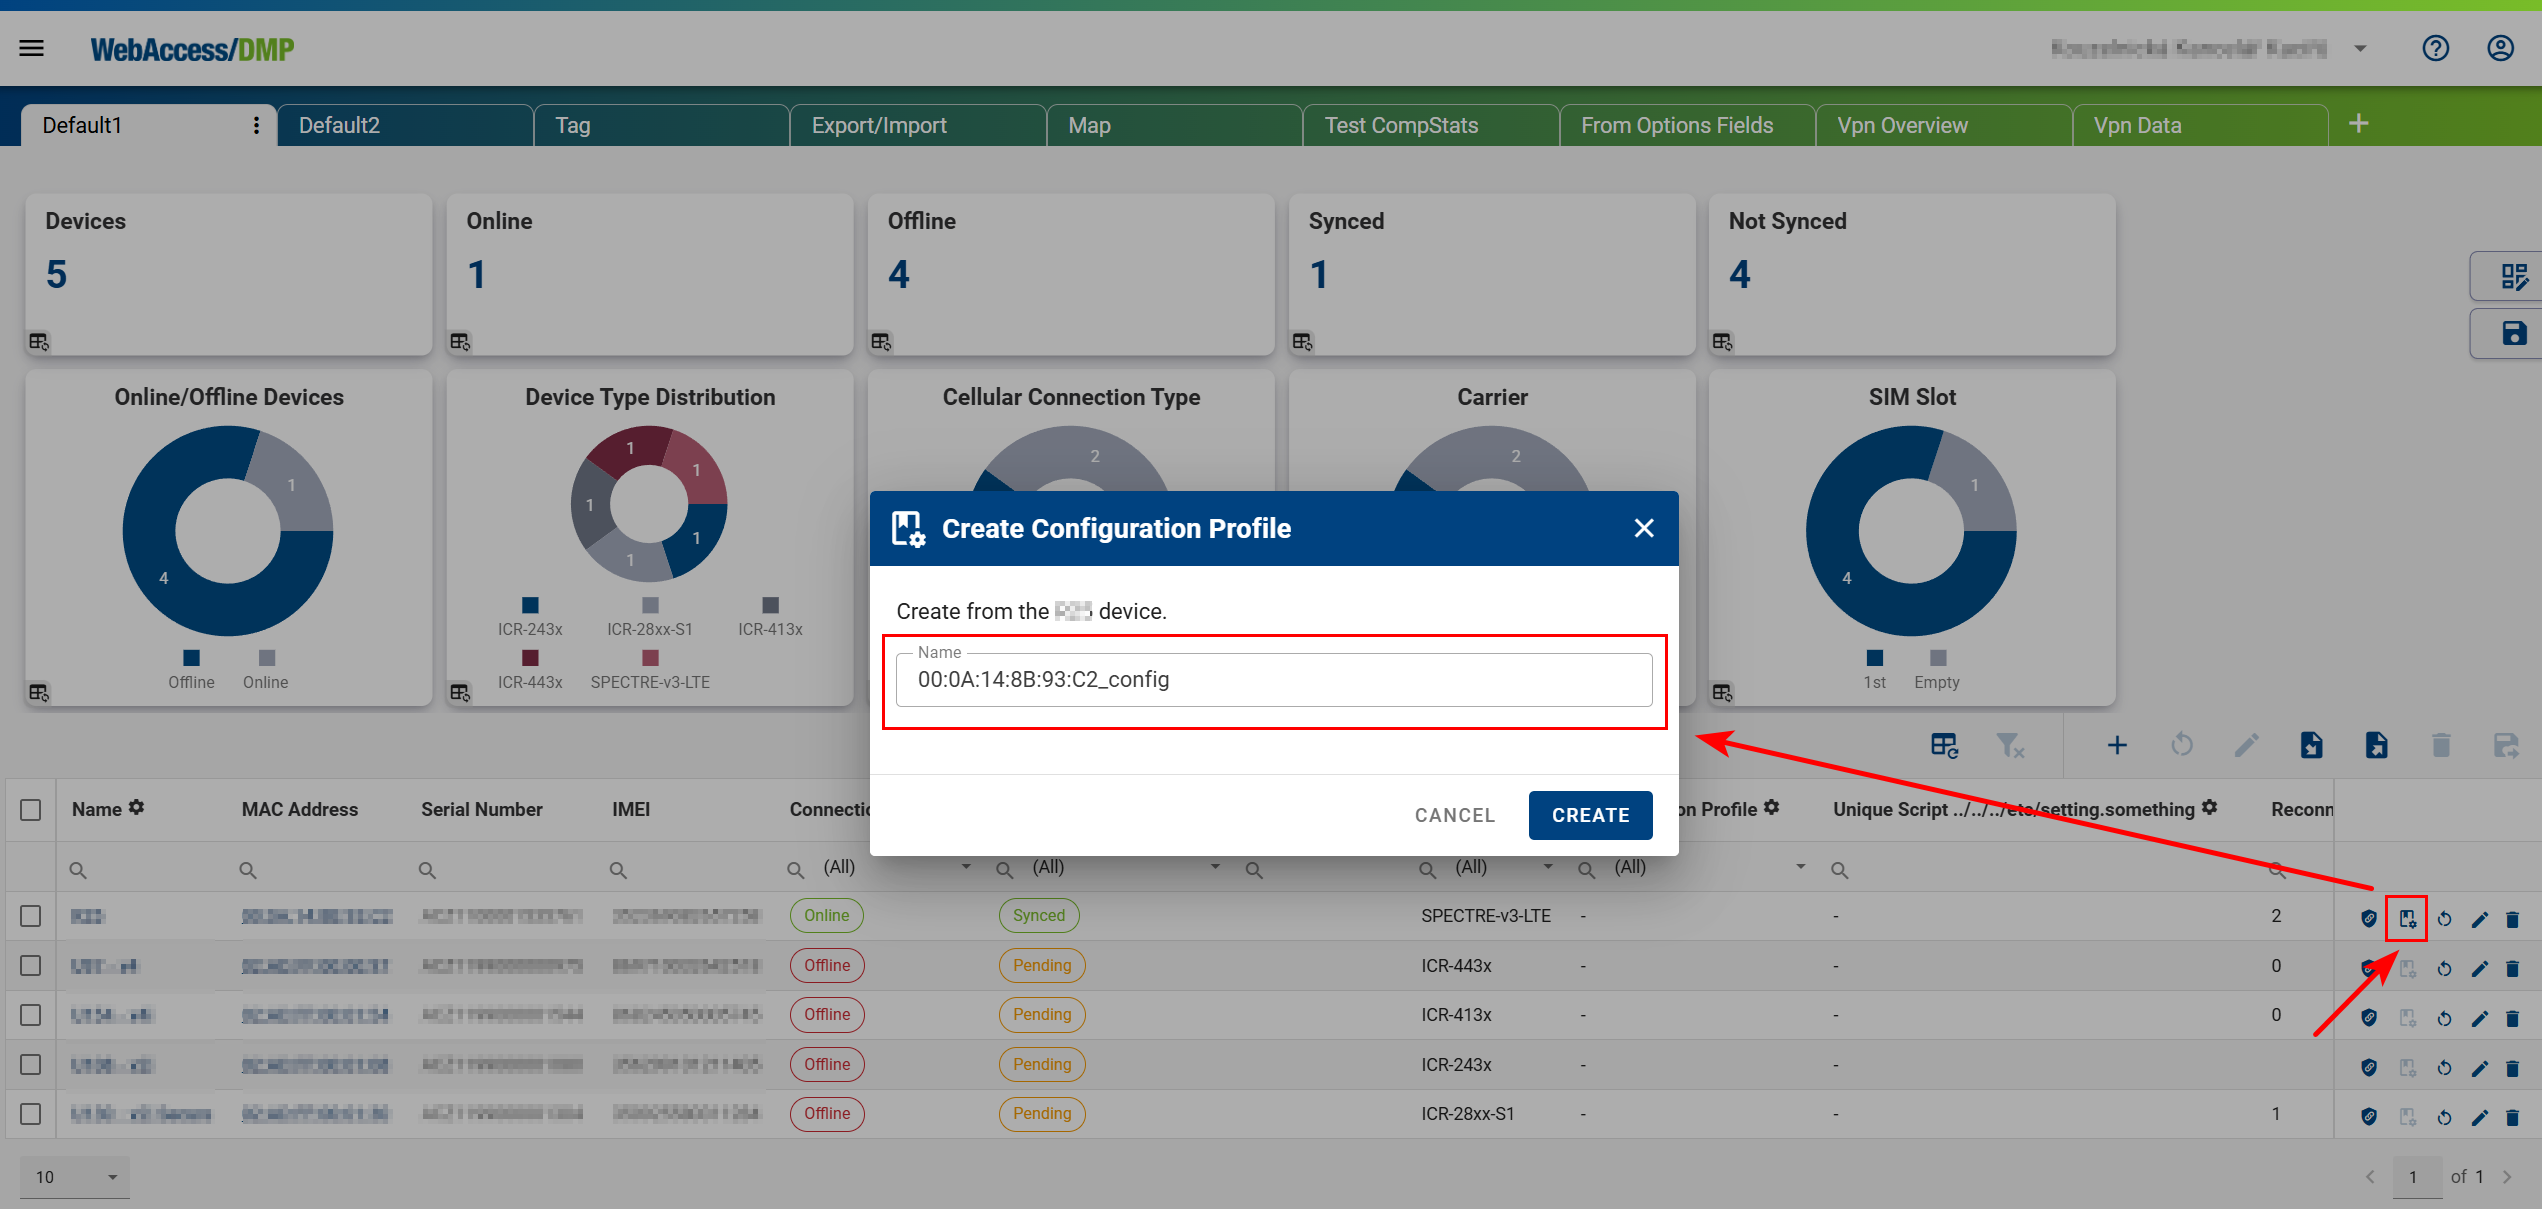
Creating a Configuration Profile from a Device Snapshot
- Select a device that represents the desired baseline configuration.
- Log in to the router’s web interface.
- Verify that the latest WebAccess/DMP Client App is installed and running.
Configure the device locally via the router web interface. This may include:
- Firmware
- Router Apps
- Device settings
- Scripts
- Users
Open the Dashboard in WebAccess/DMP and locate the device.
Use the Create Configuration Profile icon from the device row or from the device detail page header.
Note:
If a Configuration Profile is already assigned to the device, the new profile will include:
- The original Configuration Profile values
- Any additional device-specific managed fields
- Apply the newly created Configuration Profile to other devices within the same company.
Example
If a Configuration Profile is created from a device with:
ETH_IPADDR = 10.10.10.1
and applied to another device, that value will overwrite the target device’s setting.
To prevent this:
- Create a Unique Setting Value Field with the exact setting name (e.g.
ETH_IPADDR) - Assign device-specific values (e.g.
10.10.10.2)
Unique Setting Value Fields override Configuration Profile values.
Manage Configuration Profiles in the Configuration Profiles section.
View profile details by selecting a profile.
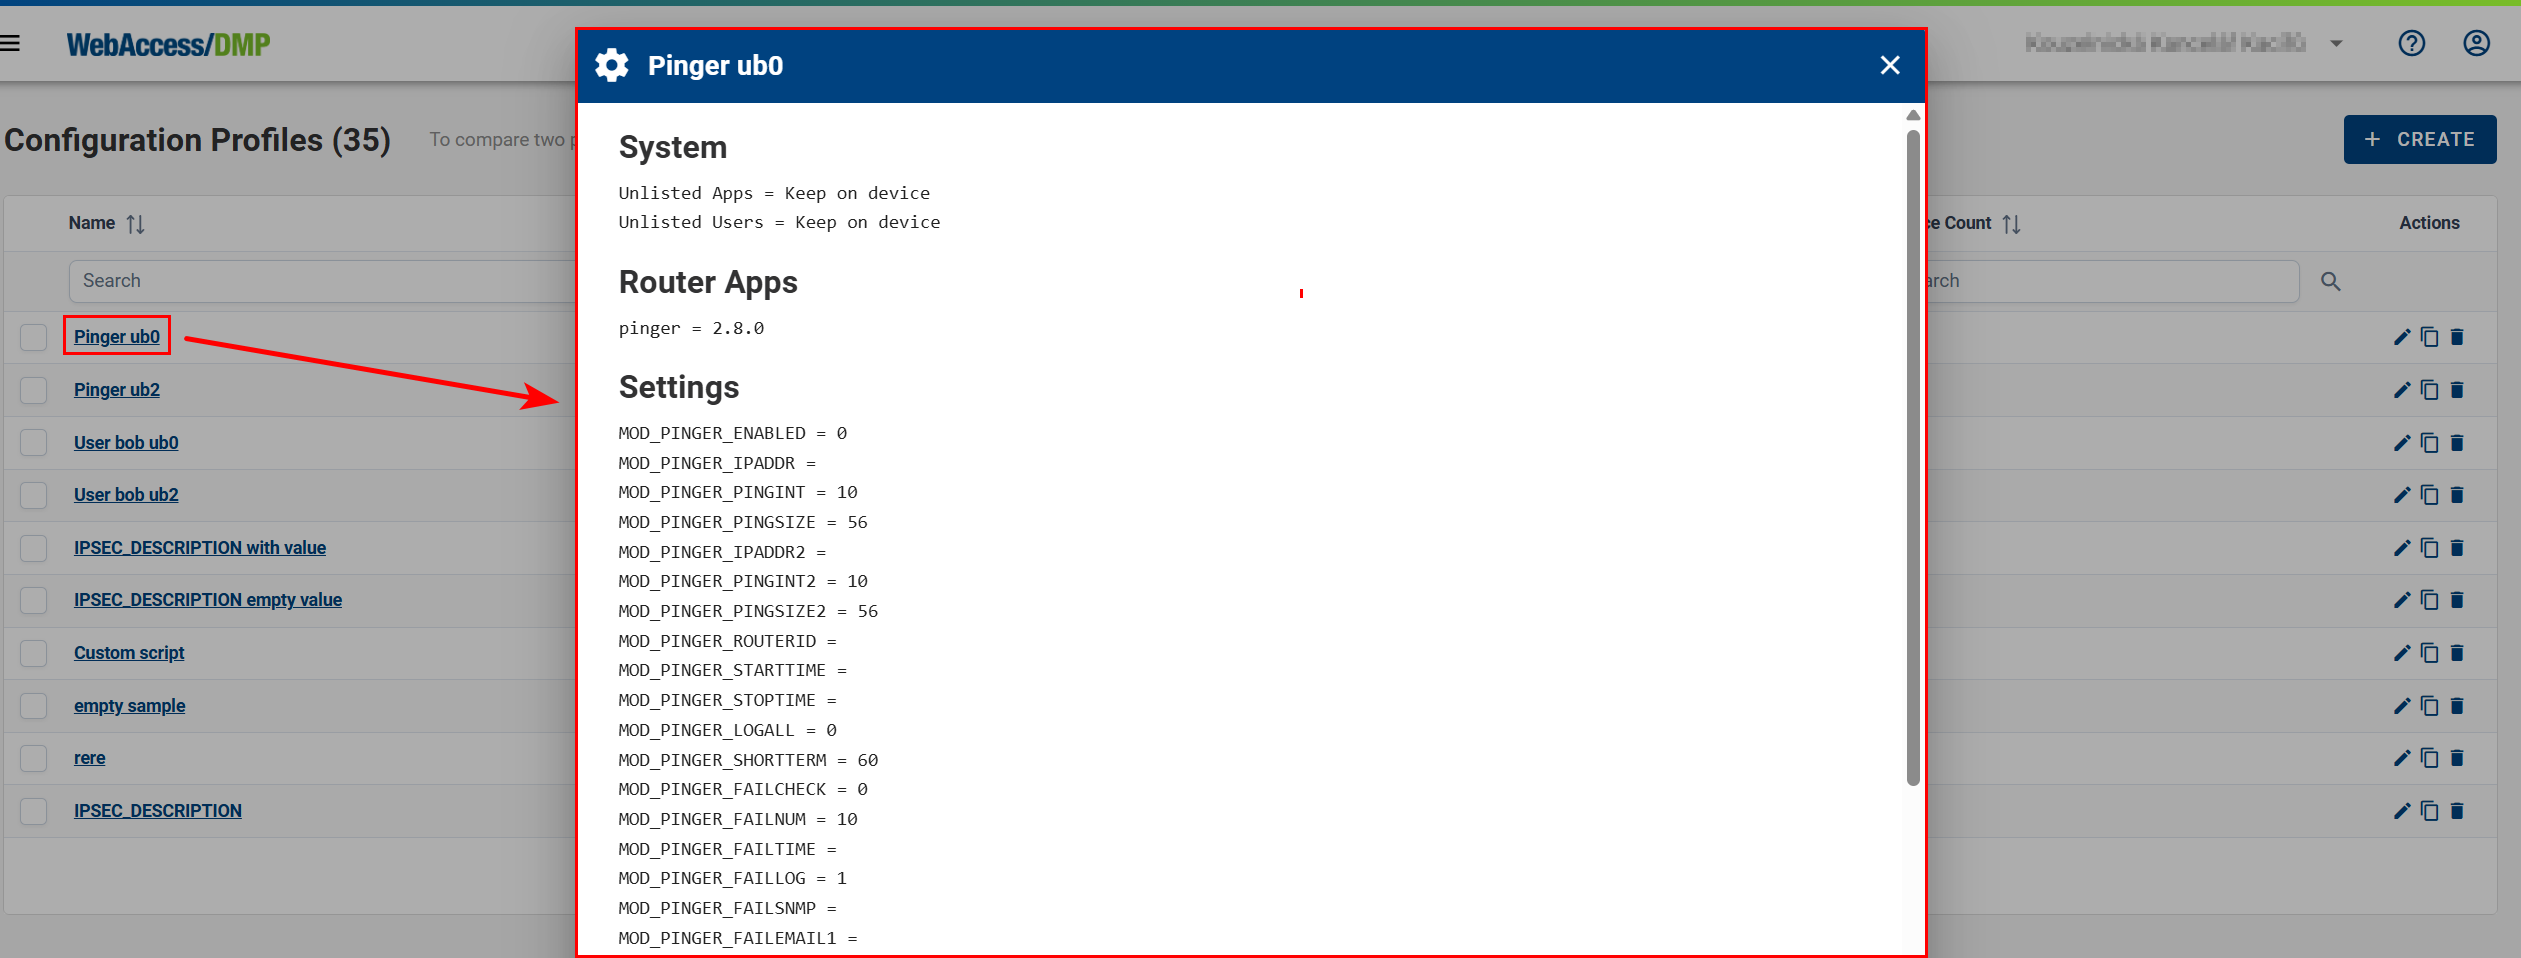
- You can clone, delete, or create profiles from scratch if you know the required setting names and values.
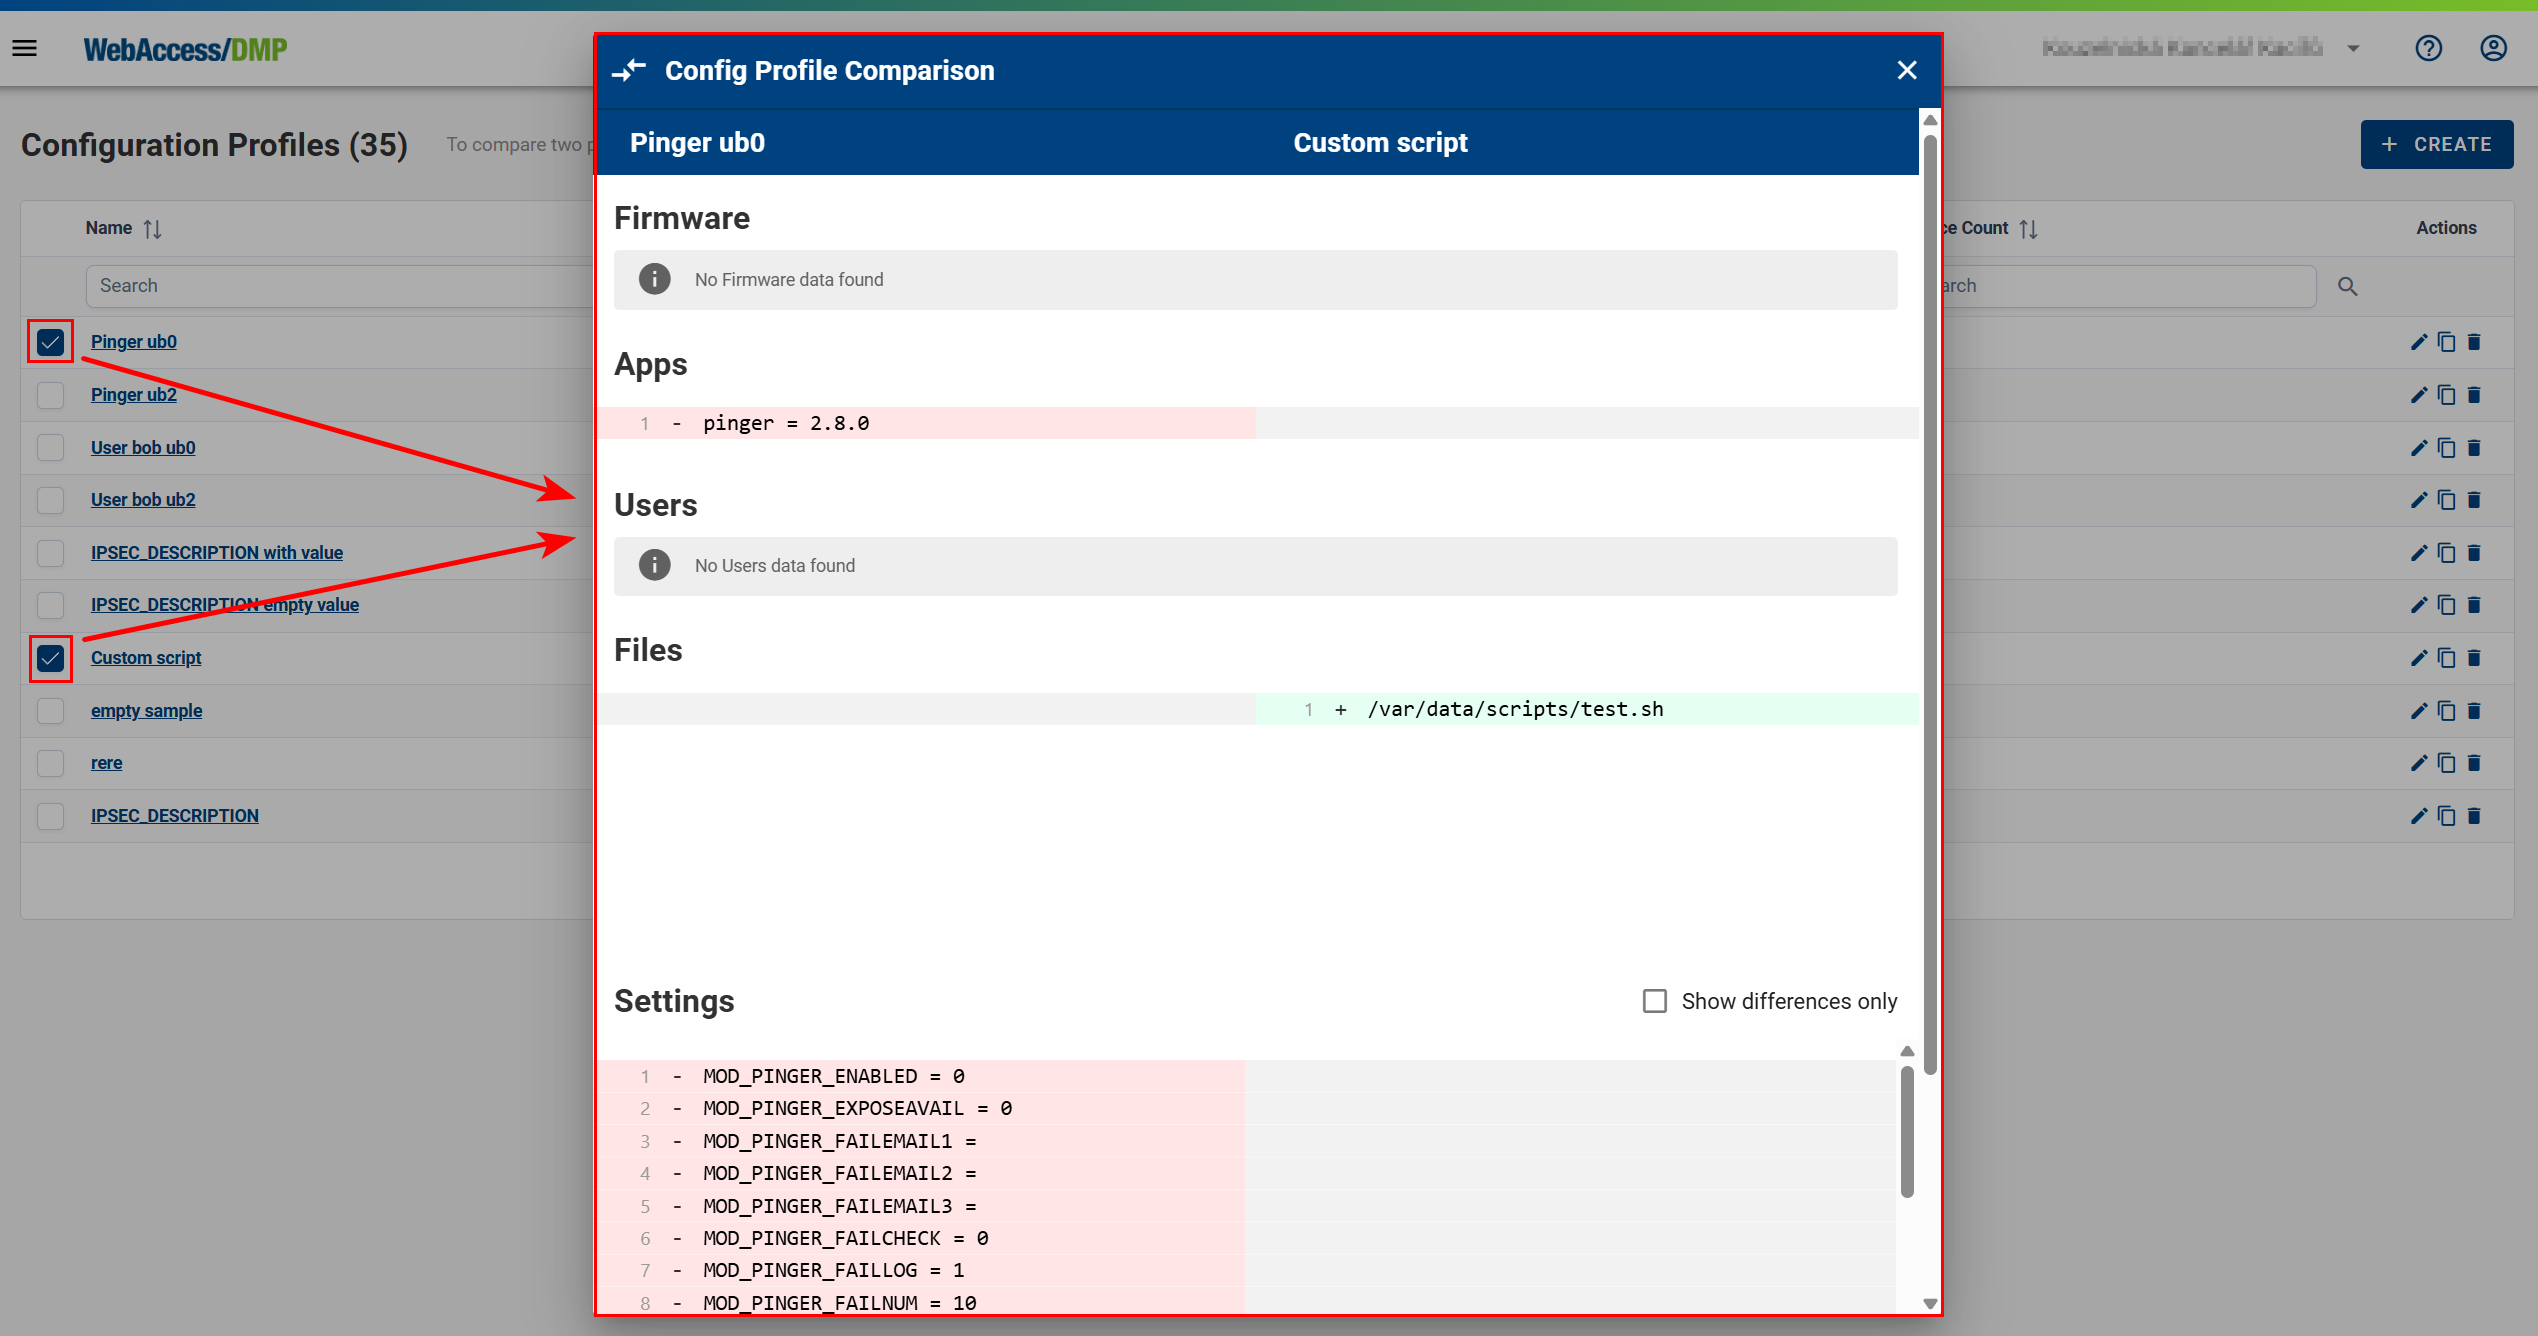
- Compare two Configuration Profiles side by side.
Overriding Specific Settings
Specific settings can be overridden in two ways:
- By editing fields directly in the device table
- By configuring settings on the Desired Configuration tab of the device page
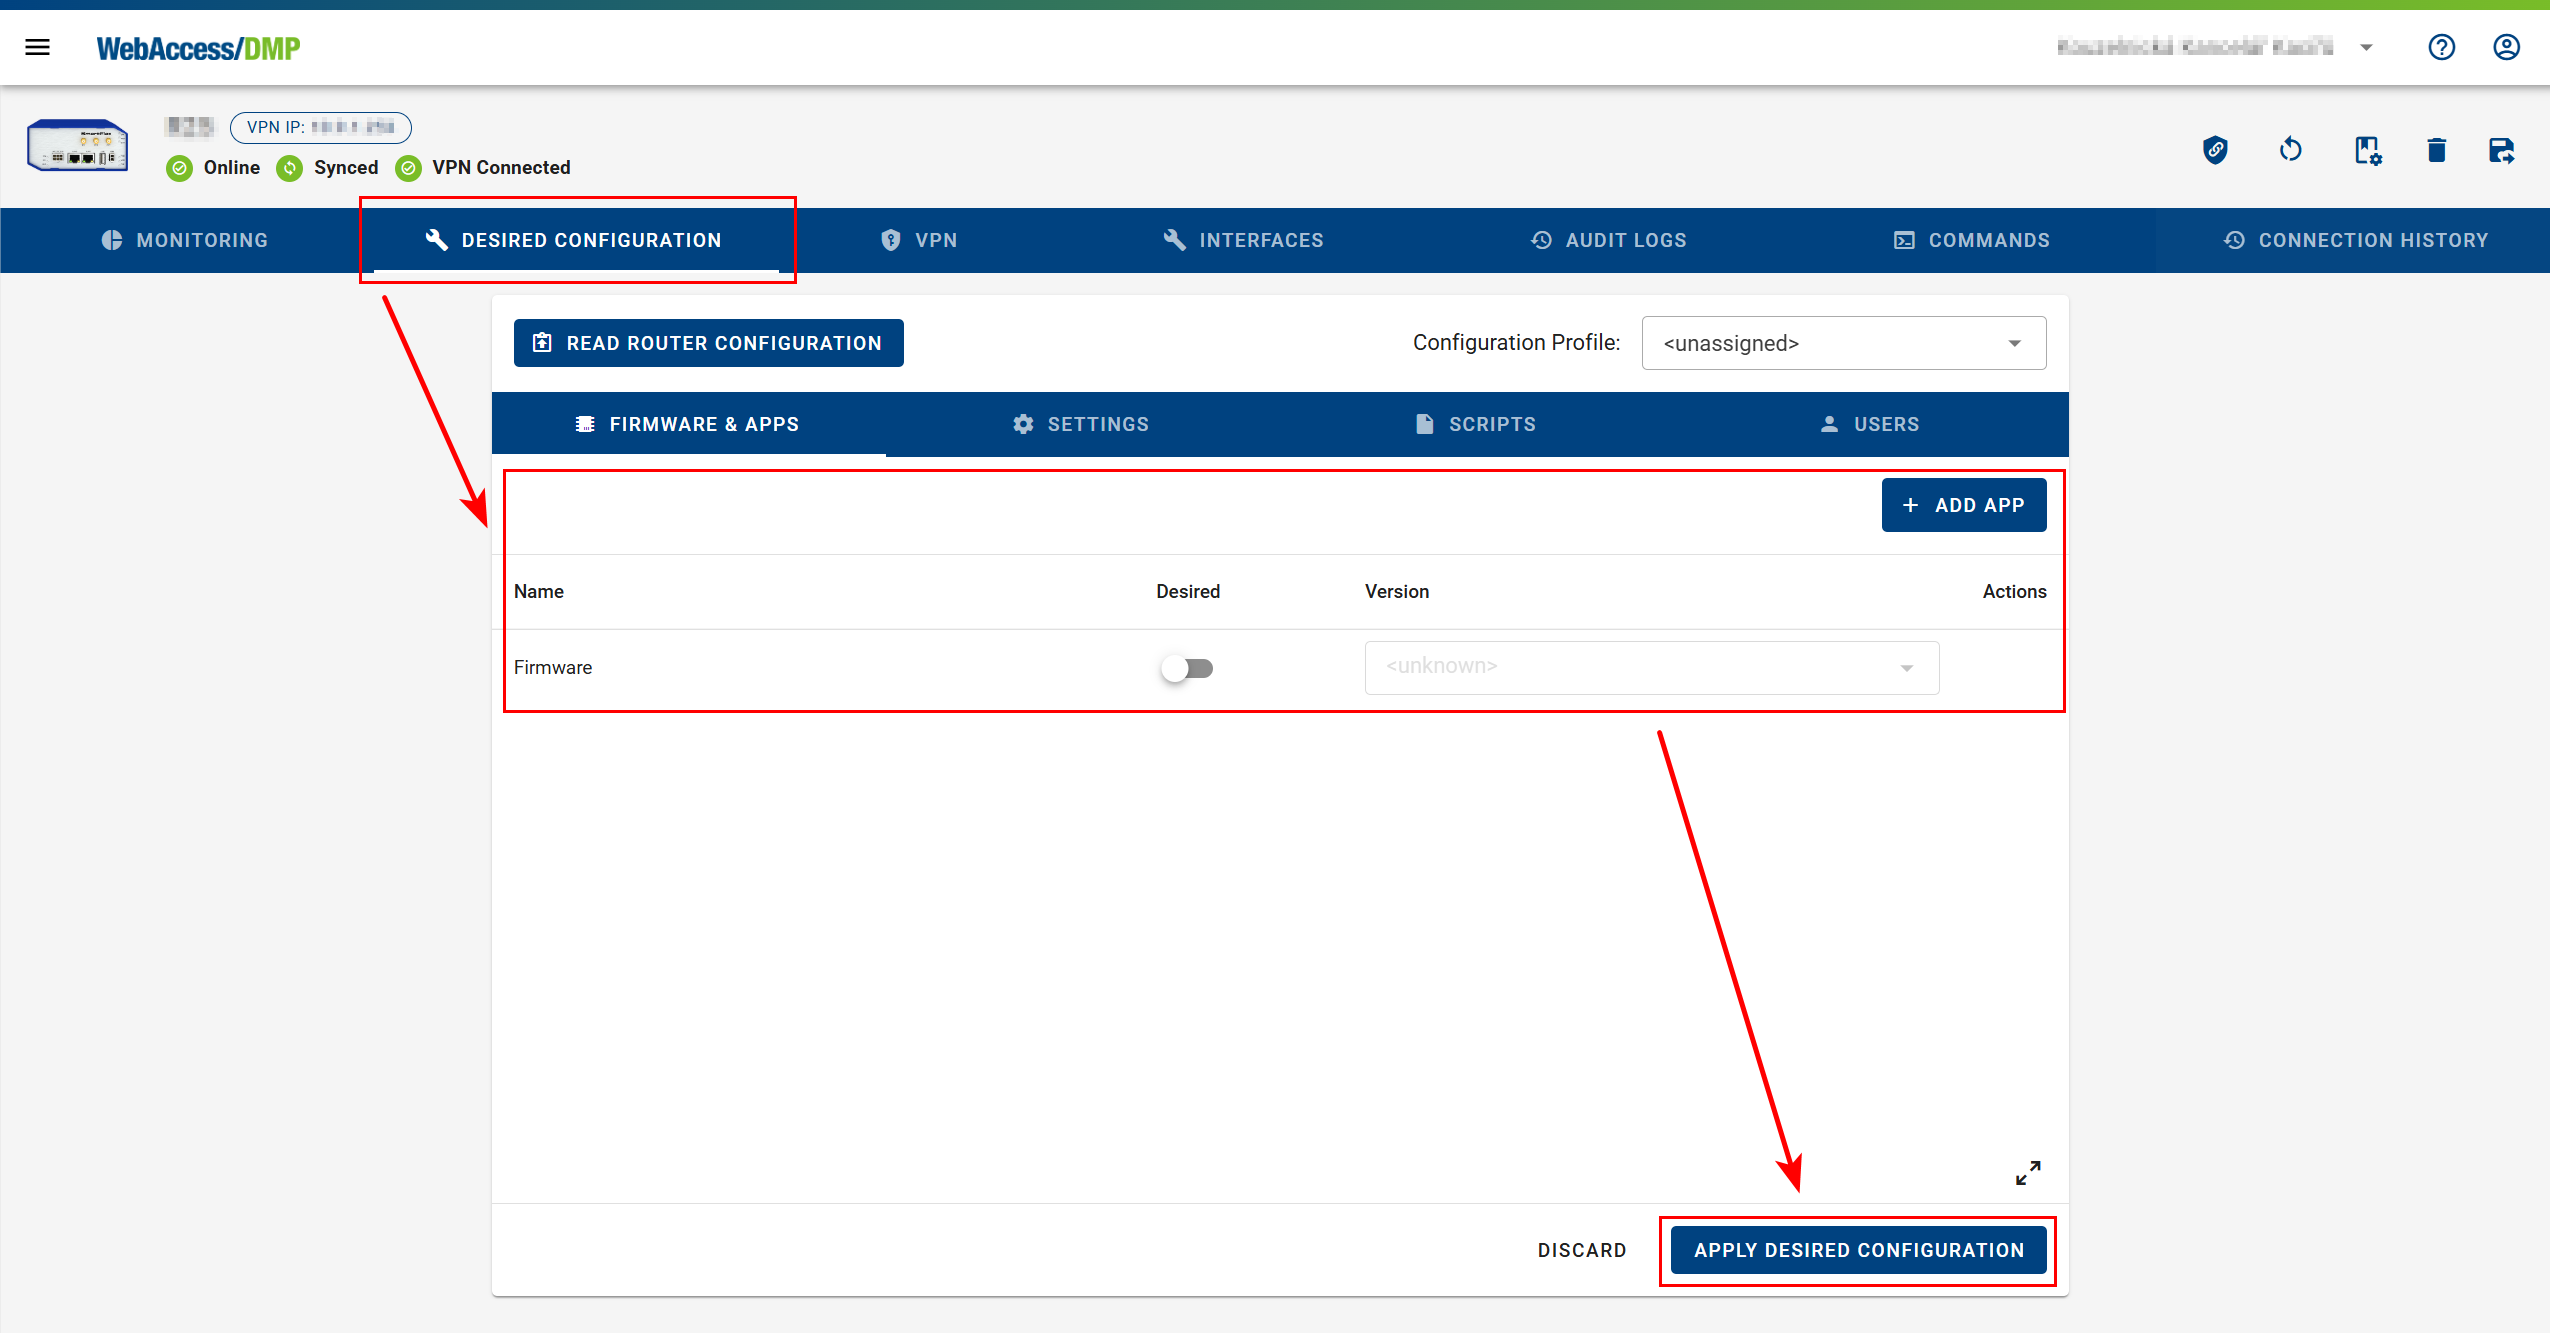
On the Desired Configuration tab:
- You can assign or unassign a Configuration Profile.
- If no profile is assigned, click Read Router Configuration to load current device settings
(device must be online). - Individual settings can be marked as Desired (managed).
This automatically creates a corresponding Field if it does not already exist.
You can manage:
- Firmware and Apps
- Settings
- Scripts
- Users
Changes are applied to the device after clicking Apply Desired Configuration.
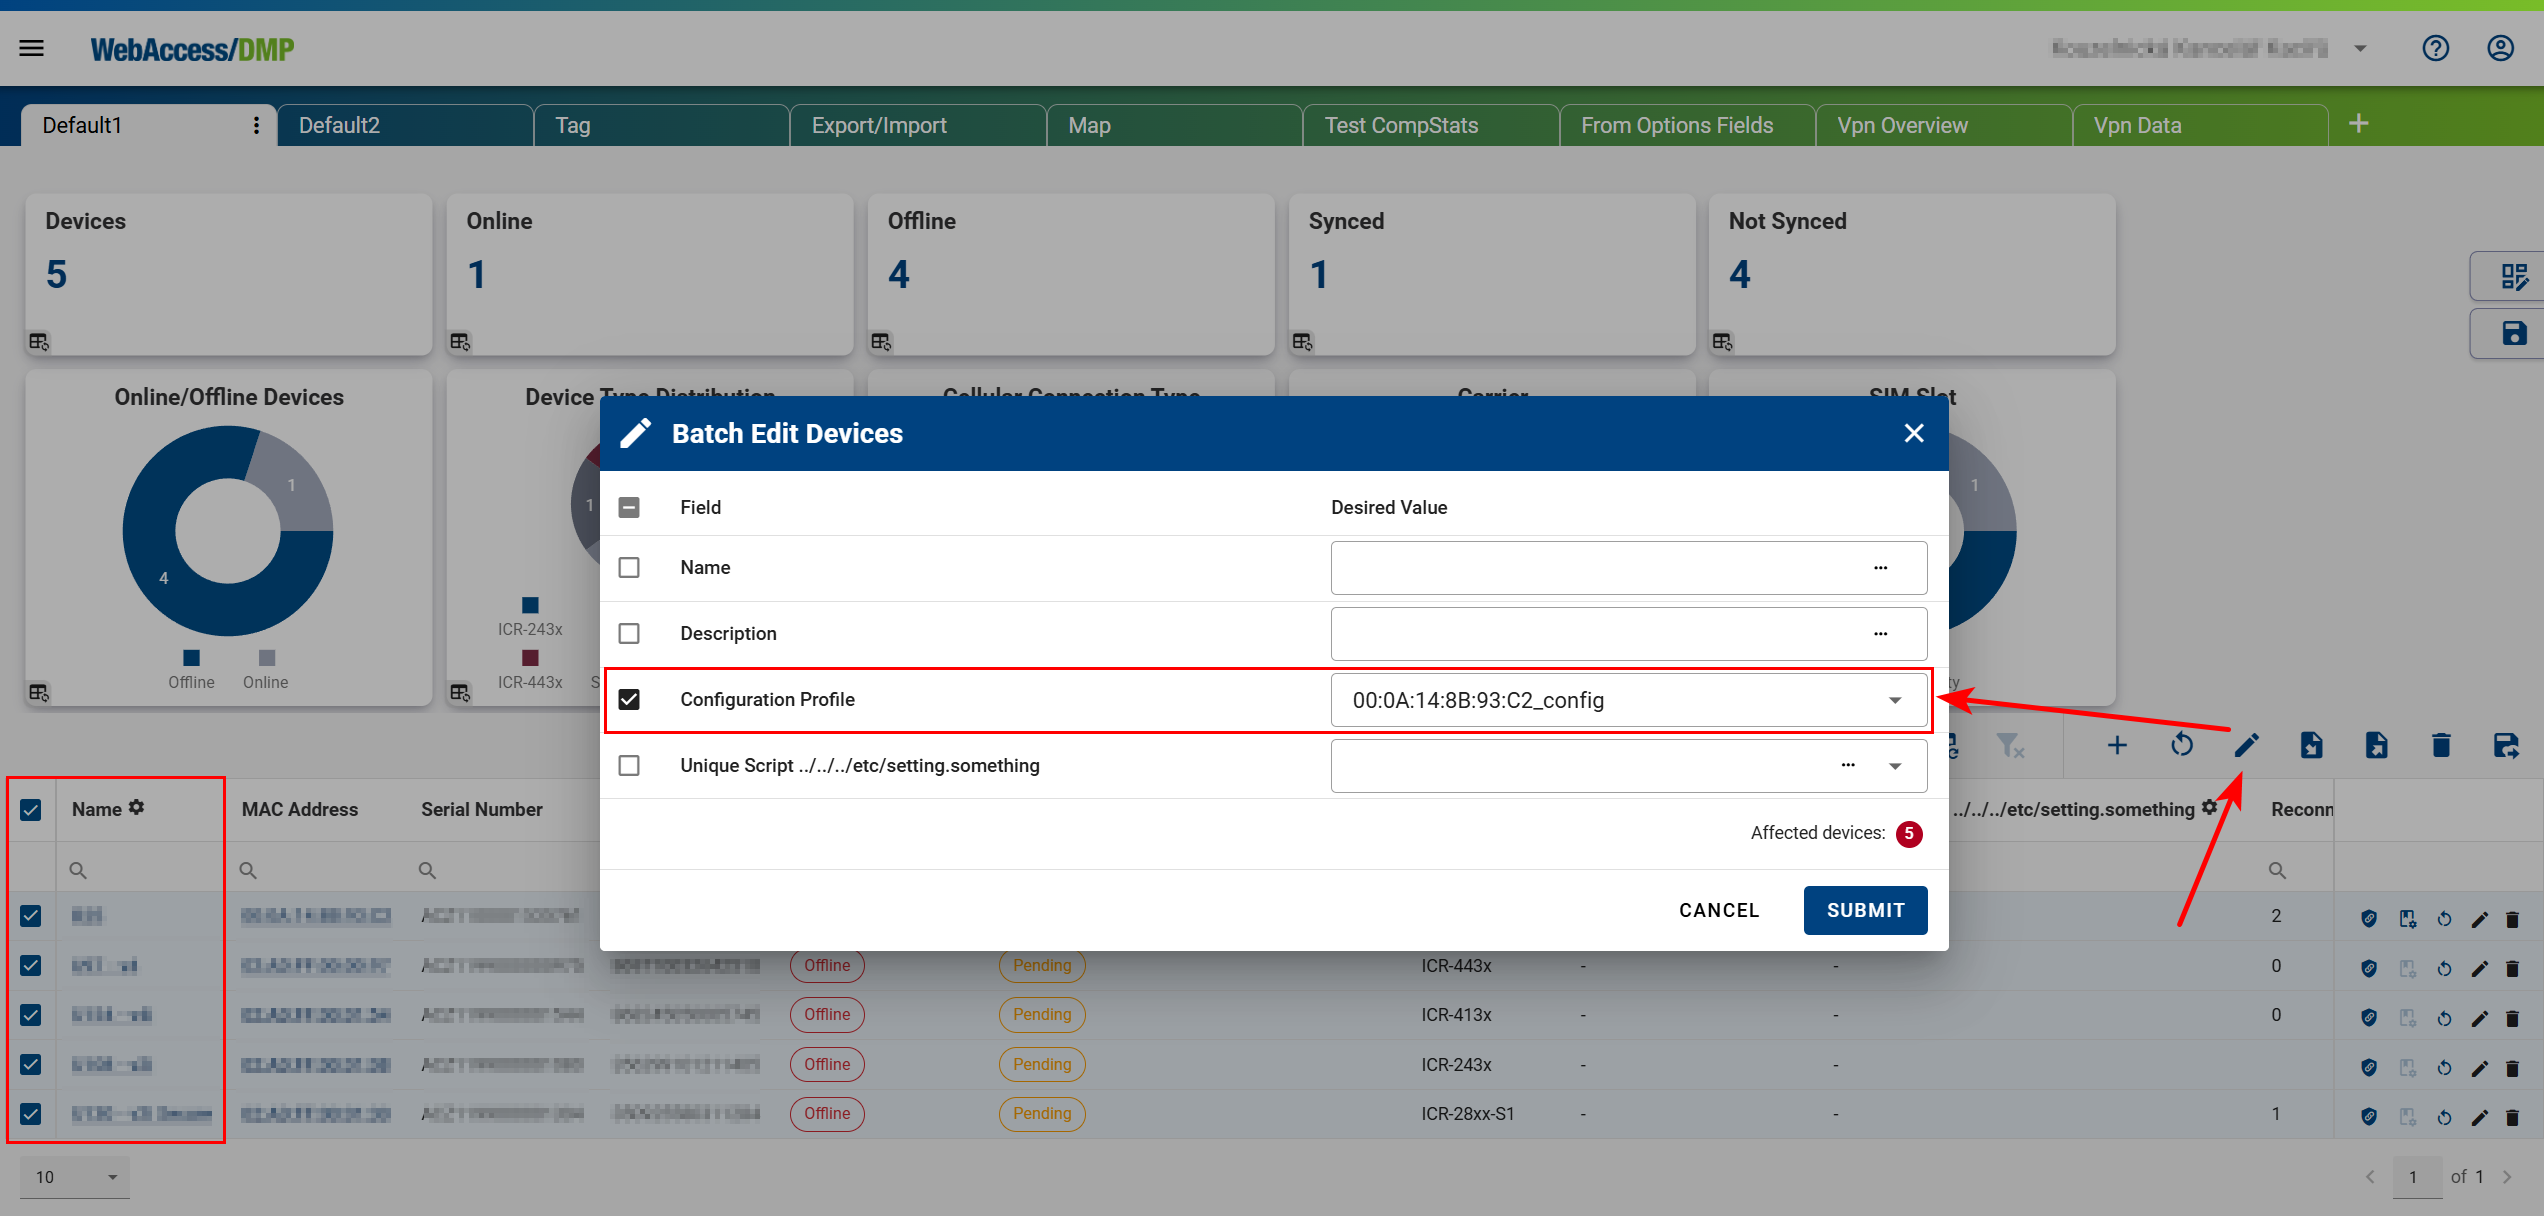
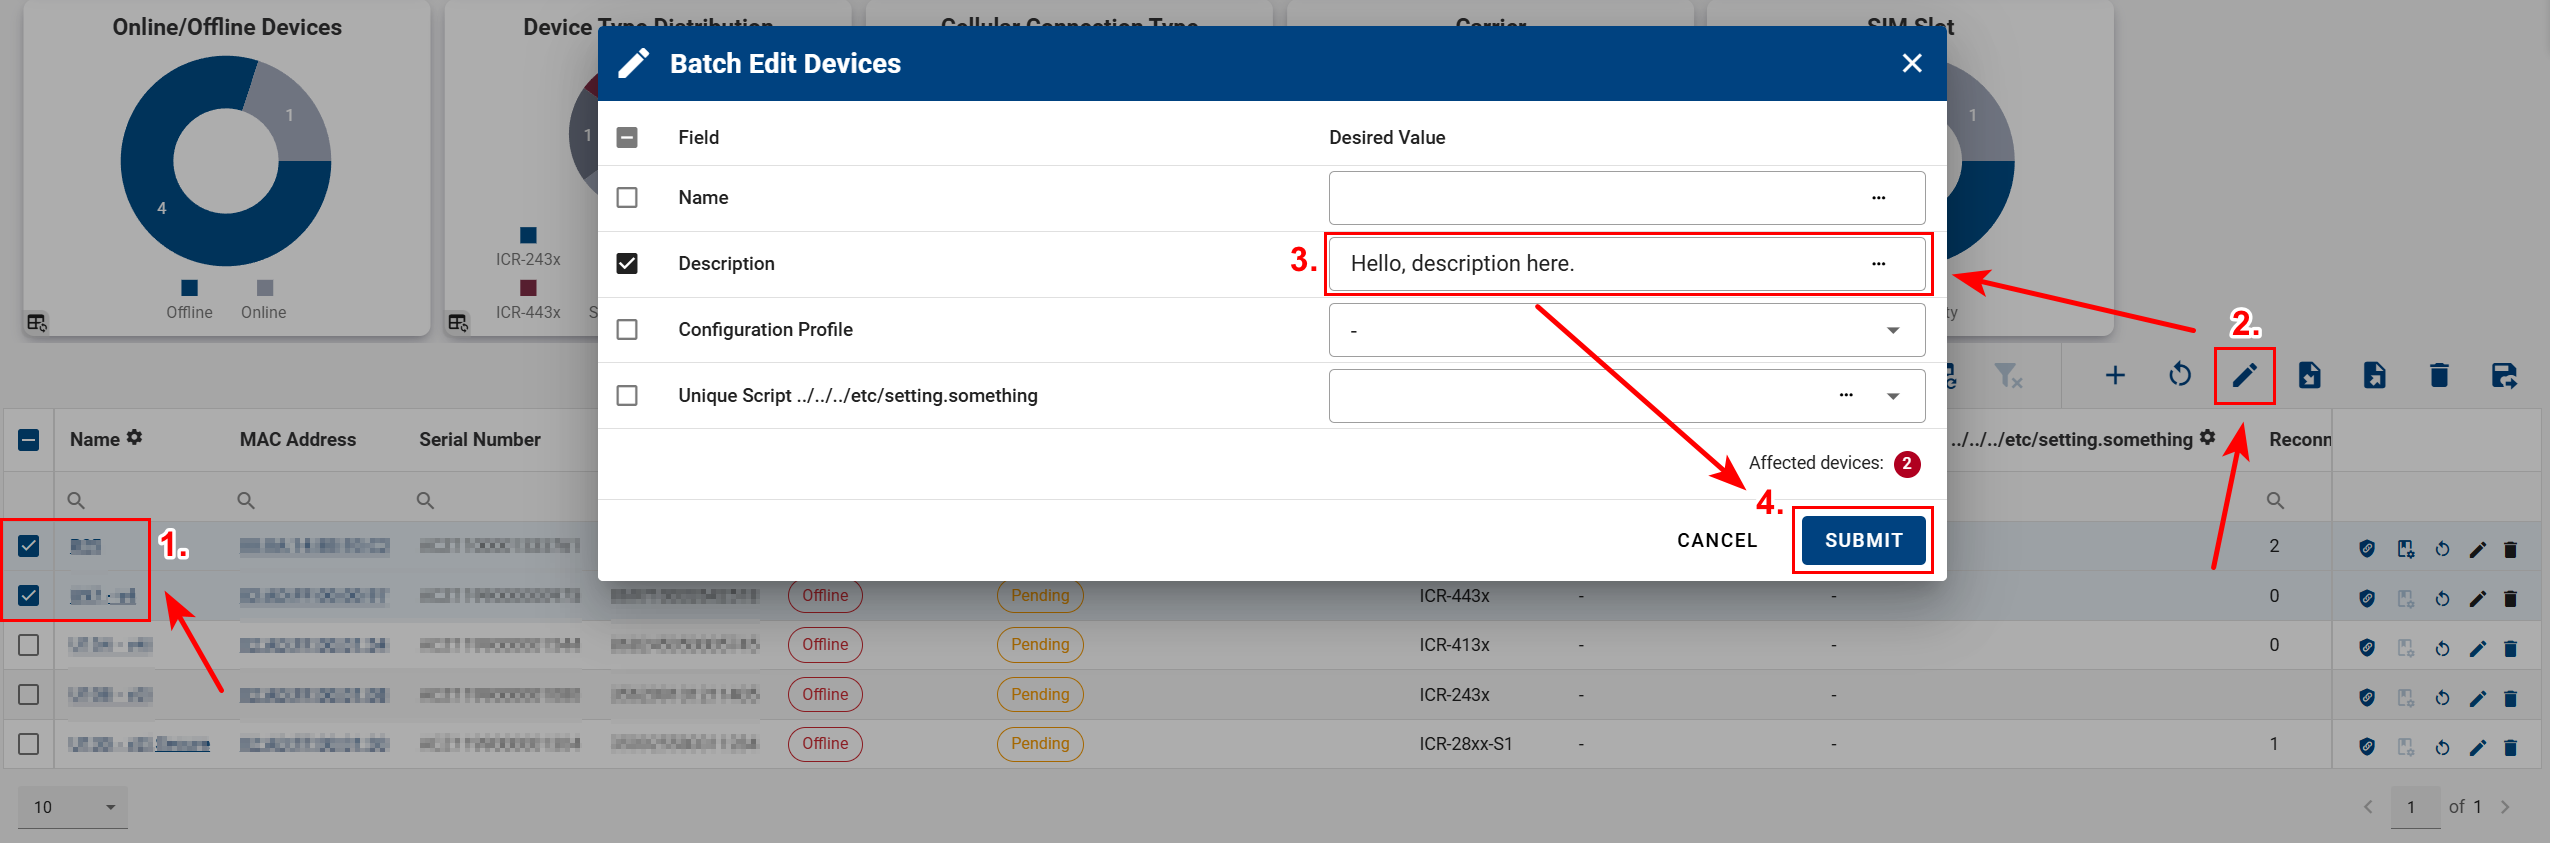
Performing Batch Edits
Batch Edit from the Dashboard
- Select one or more devices (selecting all ignores pagination).
- Click Edit Multiple Devices.
- Modify values in the Batch Edit Devices table.
- Click Submit to apply changes to the selected devices.
Batch Edit via CSV Import
Editable fields, including configuration fields, can also be updated via CSV import.
Recommended workflow:
- Configure the dashboard device table to include all required fields.
- Export the table to CSV.
- Edit values using a spreadsheet tool.
- Import the CSV back into the same dashboard view.
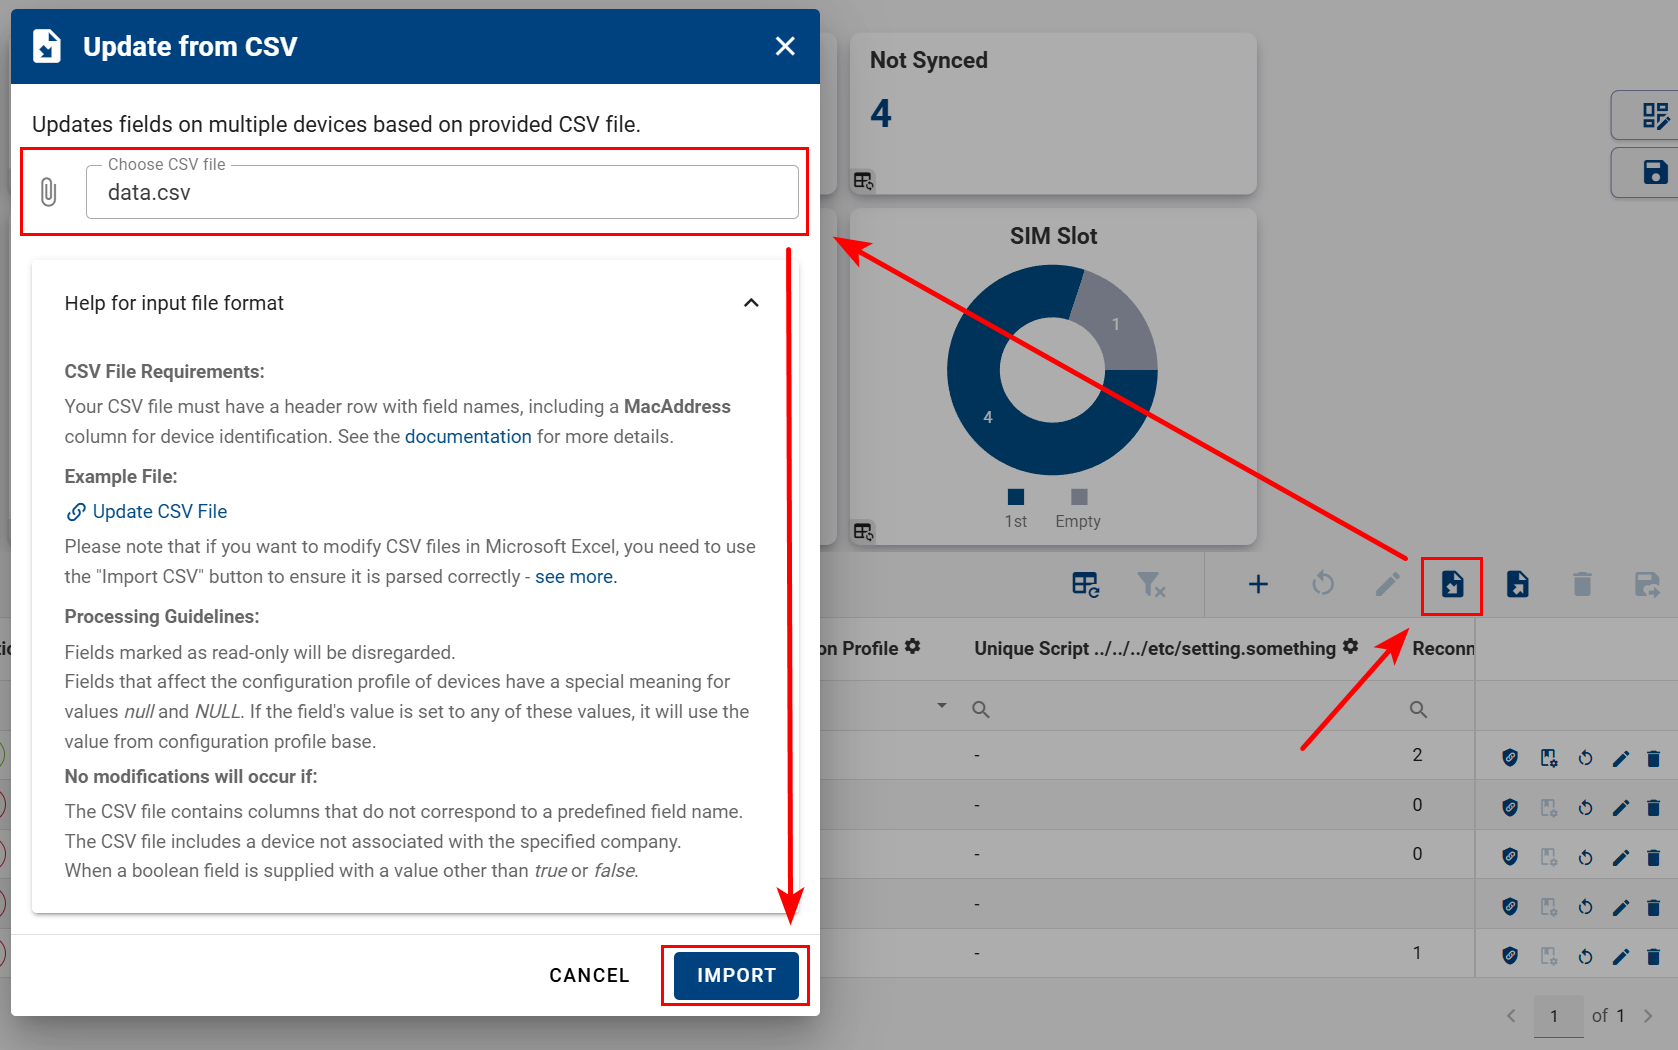
Need help with CSV imports?
For detailed instructions, see the CSV Import Guide.