Appearance
Networks & Devices
Devices and Roadwarriors (remote VPN users) must be added to the same VPN Network (group) to be able to see and communicate with each other over VPN.
Networks
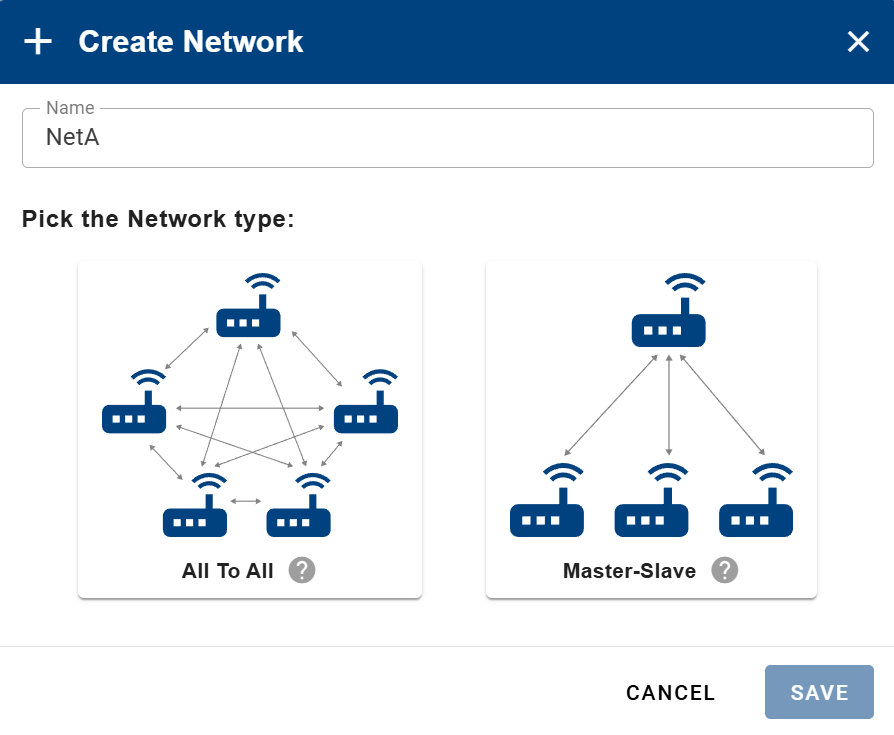
- On the Networks page, you can manage VPN Networks (groups) for your company. Navigate to VPN → Networks in the menu.
- You can create a new network by clicking the CREATE button.

- When creating a network, you can choose between two network types:
- Tooltips are available for both network types and their roles. These are shown as small gray question mark icons. Hovering over them provides additional explanations. For a more detailed description, see below.
Network Types
All-to-All
In an All-to-All network, all devices can see and communicate with each other without restrictions.- Every device can send and receive traffic to and from all other devices.
- Roadwarriors have a special role:
- They can see all devices.
- Devices do not see Roadwarriors.
- Roadwarriors must initiate communication.
- Roadwarriors do not see each other.
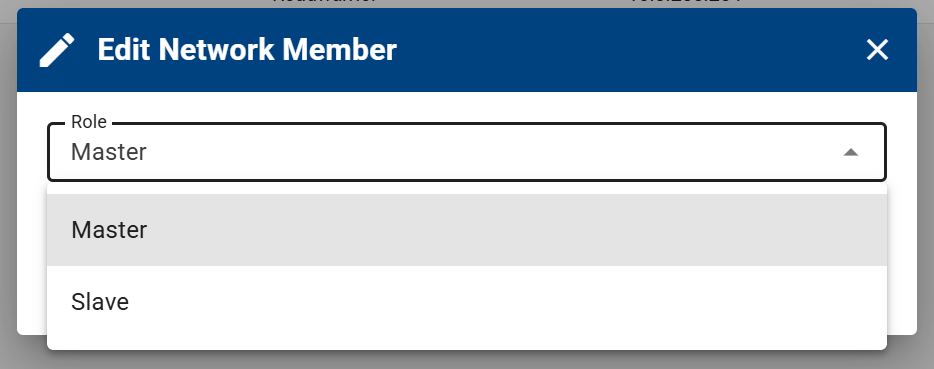
Master-to-Slave
In a Master-to-Slave network, one device acts as the Master, while the remaining devices are Slaves.- The Master and all Slaves always see each other.
- Slave devices do not see other Slaves.
- Roadwarriors have a special role:
- They can see both Master and Slave devices.
- Devices do not see Roadwarriors.
- Roadwarriors must initiate communication.
- Roadwarriors do not see each other.
- After creating networks, you can:
- Enter a network by clicking its name
- Edit or delete it using the actions on the right side of the row

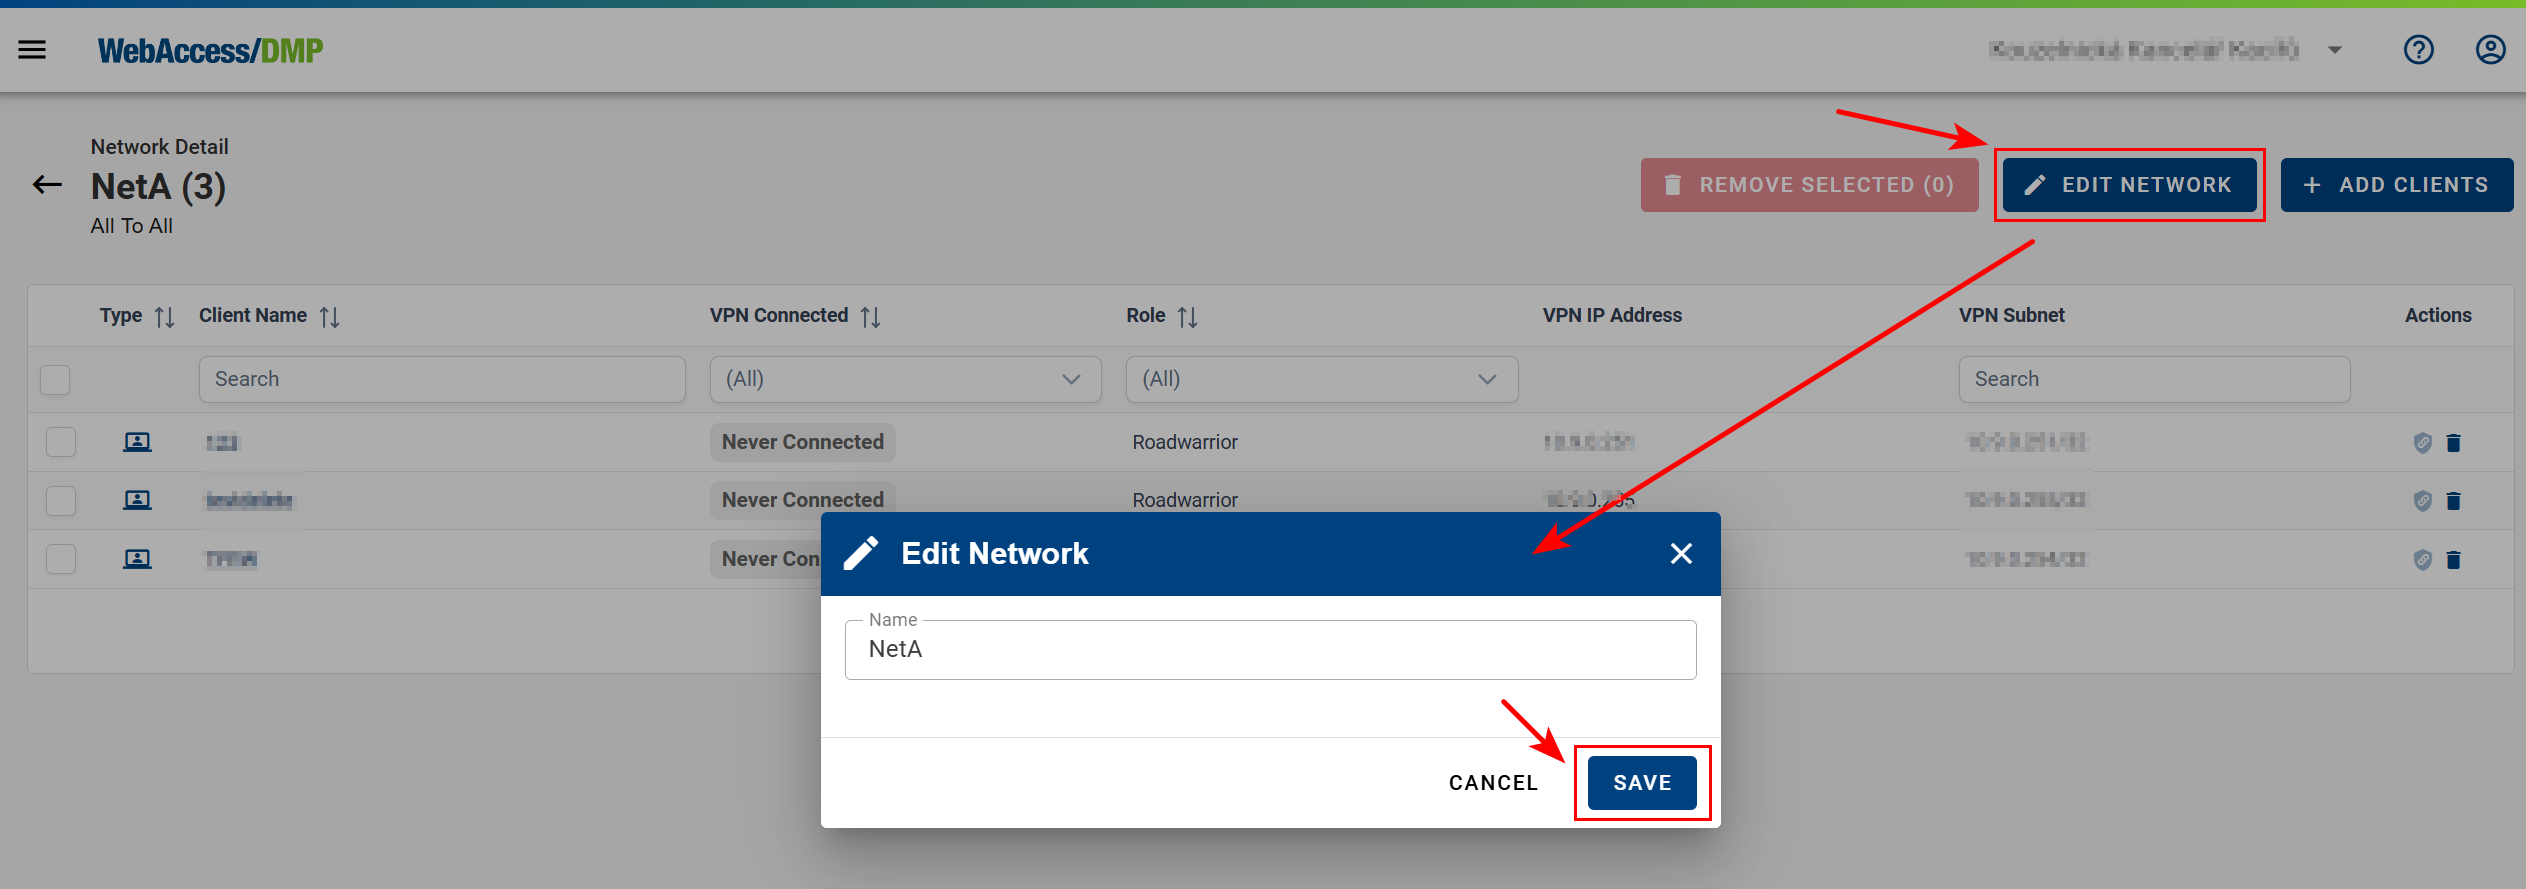
- Inside a network, you can:
- Rename the network using EDIT NETWORK
- Add devices or Roadwarriors using ADD CLIENTS
- When adding clients, you can select:
- All available devices
- Specific devices only
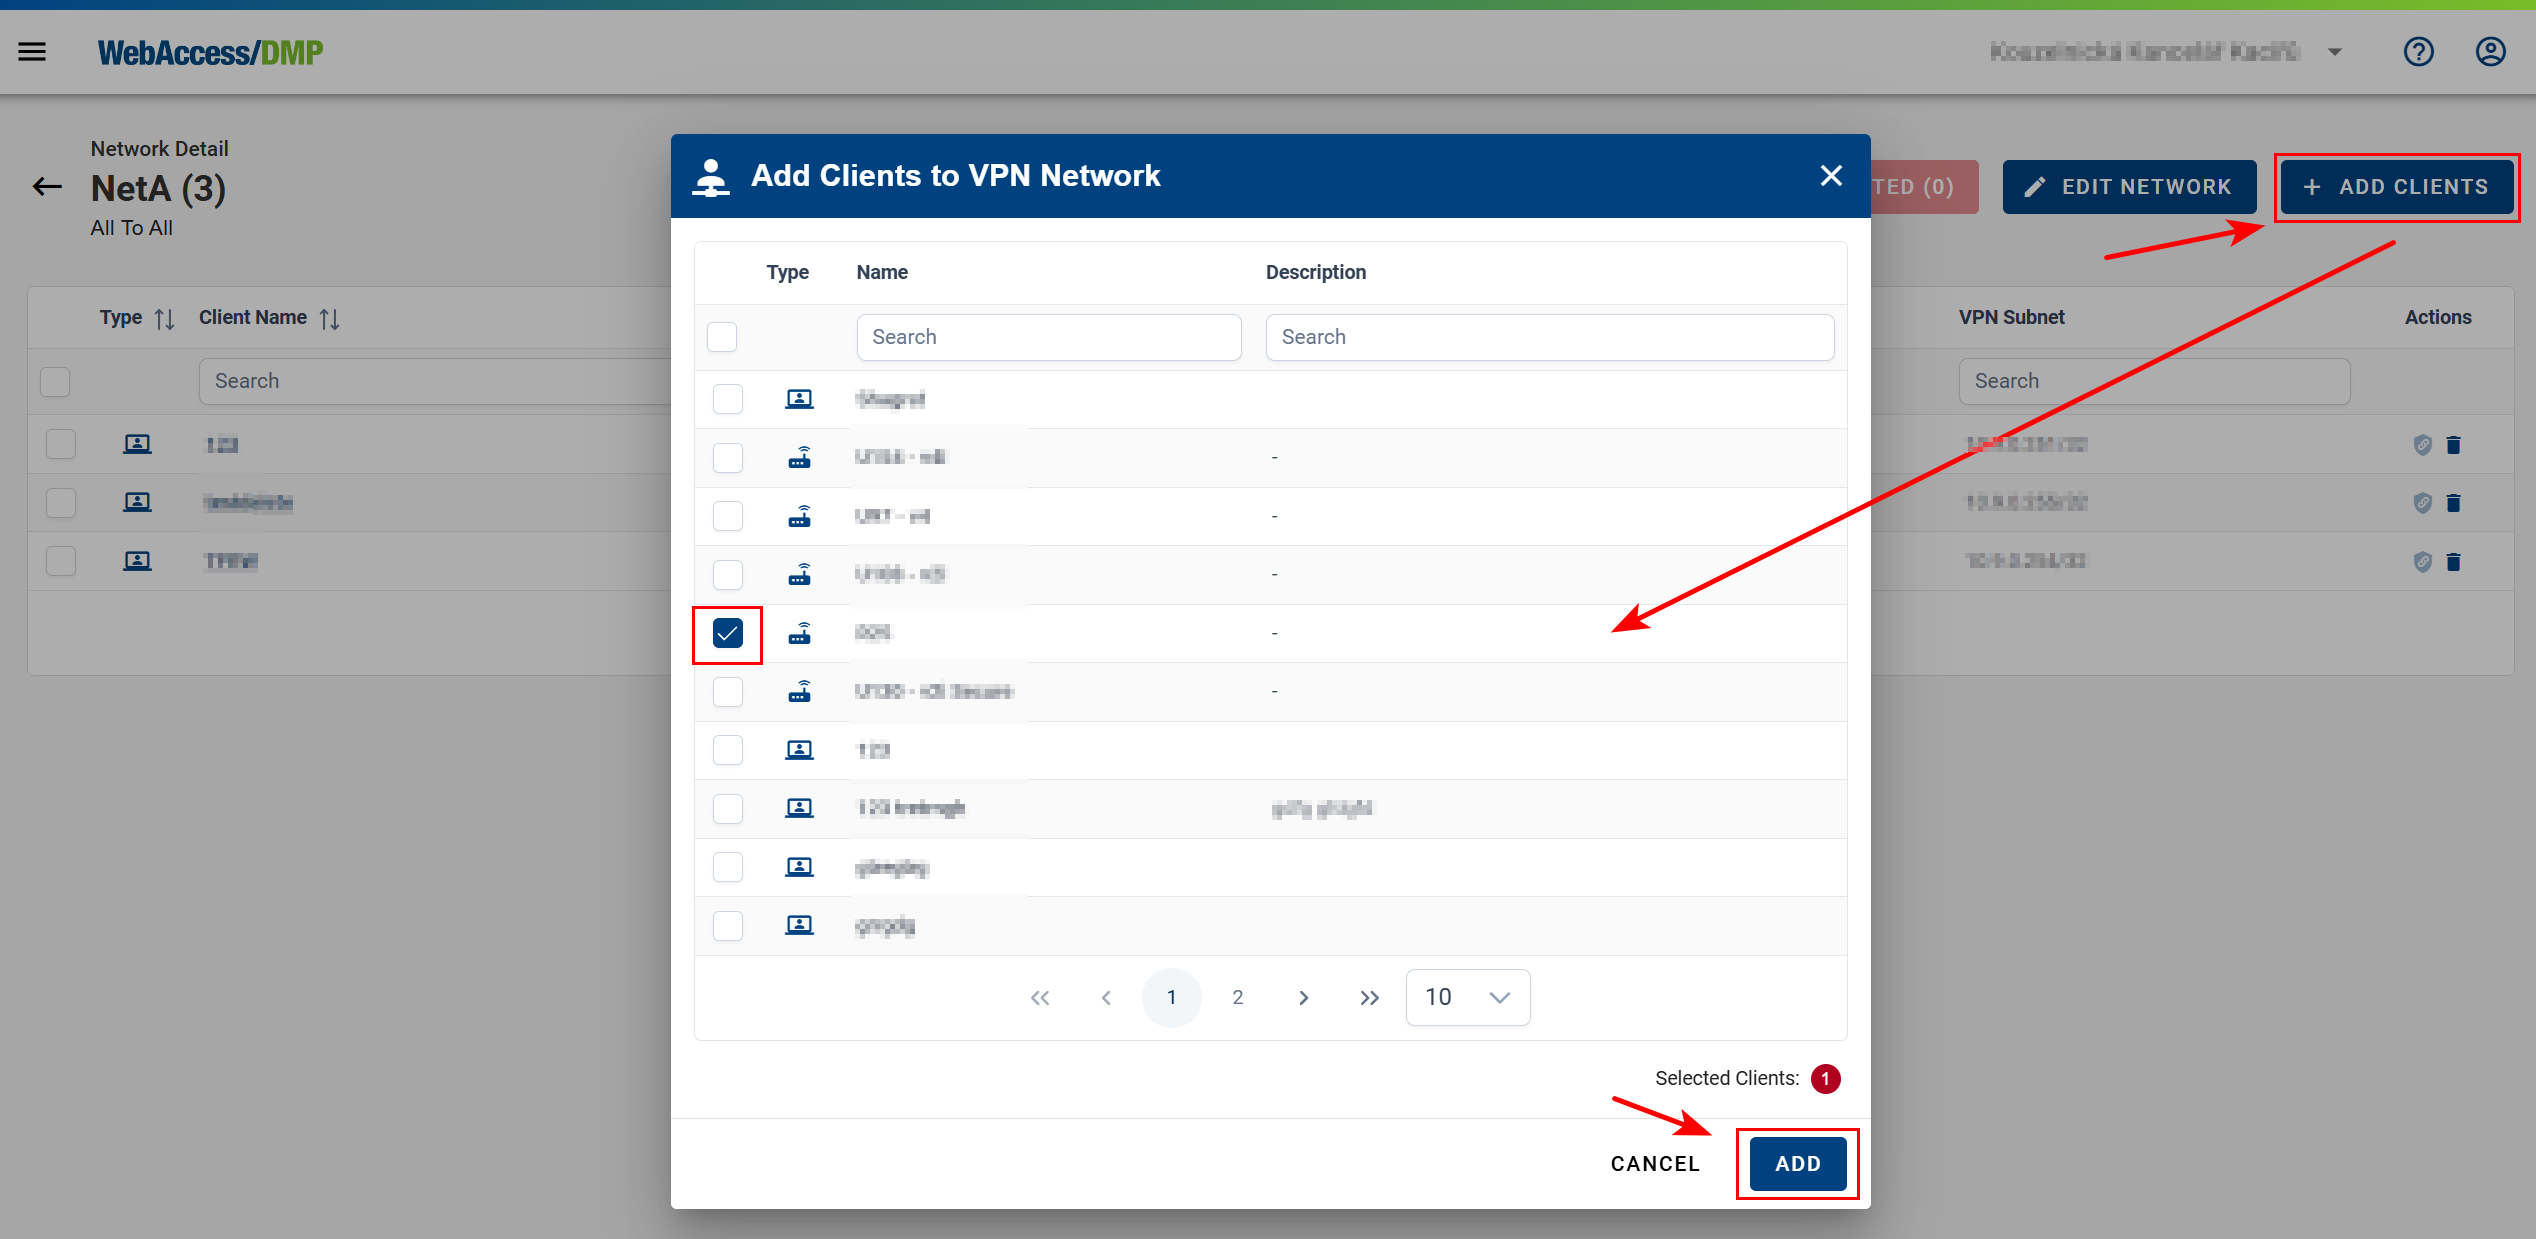
- Roadwarriors can also be added using Add Clients.
- Once devices are added, you can:
- Open the device by clicking its name
- Access the Proxy Link
- Edit its role
- Remove it from the network

- When editing a device role, you can switch between Master and Slave (available only in Master-to-Slave networks).
Devices
Device VPN Status
WARNING
Note: To connect a device to VPN, the WebAccess/DMP Client Router App version 3.2.0 or later must be installed.
The VPN connection status of a device is visible:
- In the device page header
- Via the VPN Connected Field on the dashboard
- On the VPN Network detail page when the device is part of a network

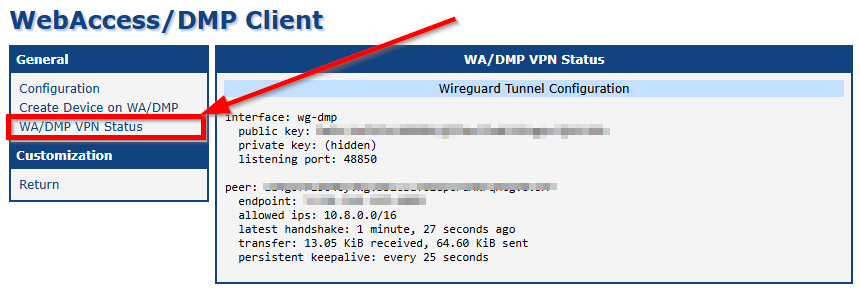
On the router itself, you can check the VPN connection status in the WebAccess/DMP Client Router App:
Removing Devices from a VPN Network
To remove devices from a VPN network, open the network details and select the devices you want to remove. You can remove up to 5,000 devices at once.

VPN Tab on the Device Detail Page
In the device’s VPN tab, you can configure the following options:
- VPN Enabled
Enable or disable the device’s VPN client.- When disabled, the device disconnects from VPN and stops routing VPN traffic.
- When enabled, it reconnects and resumes secure communication.
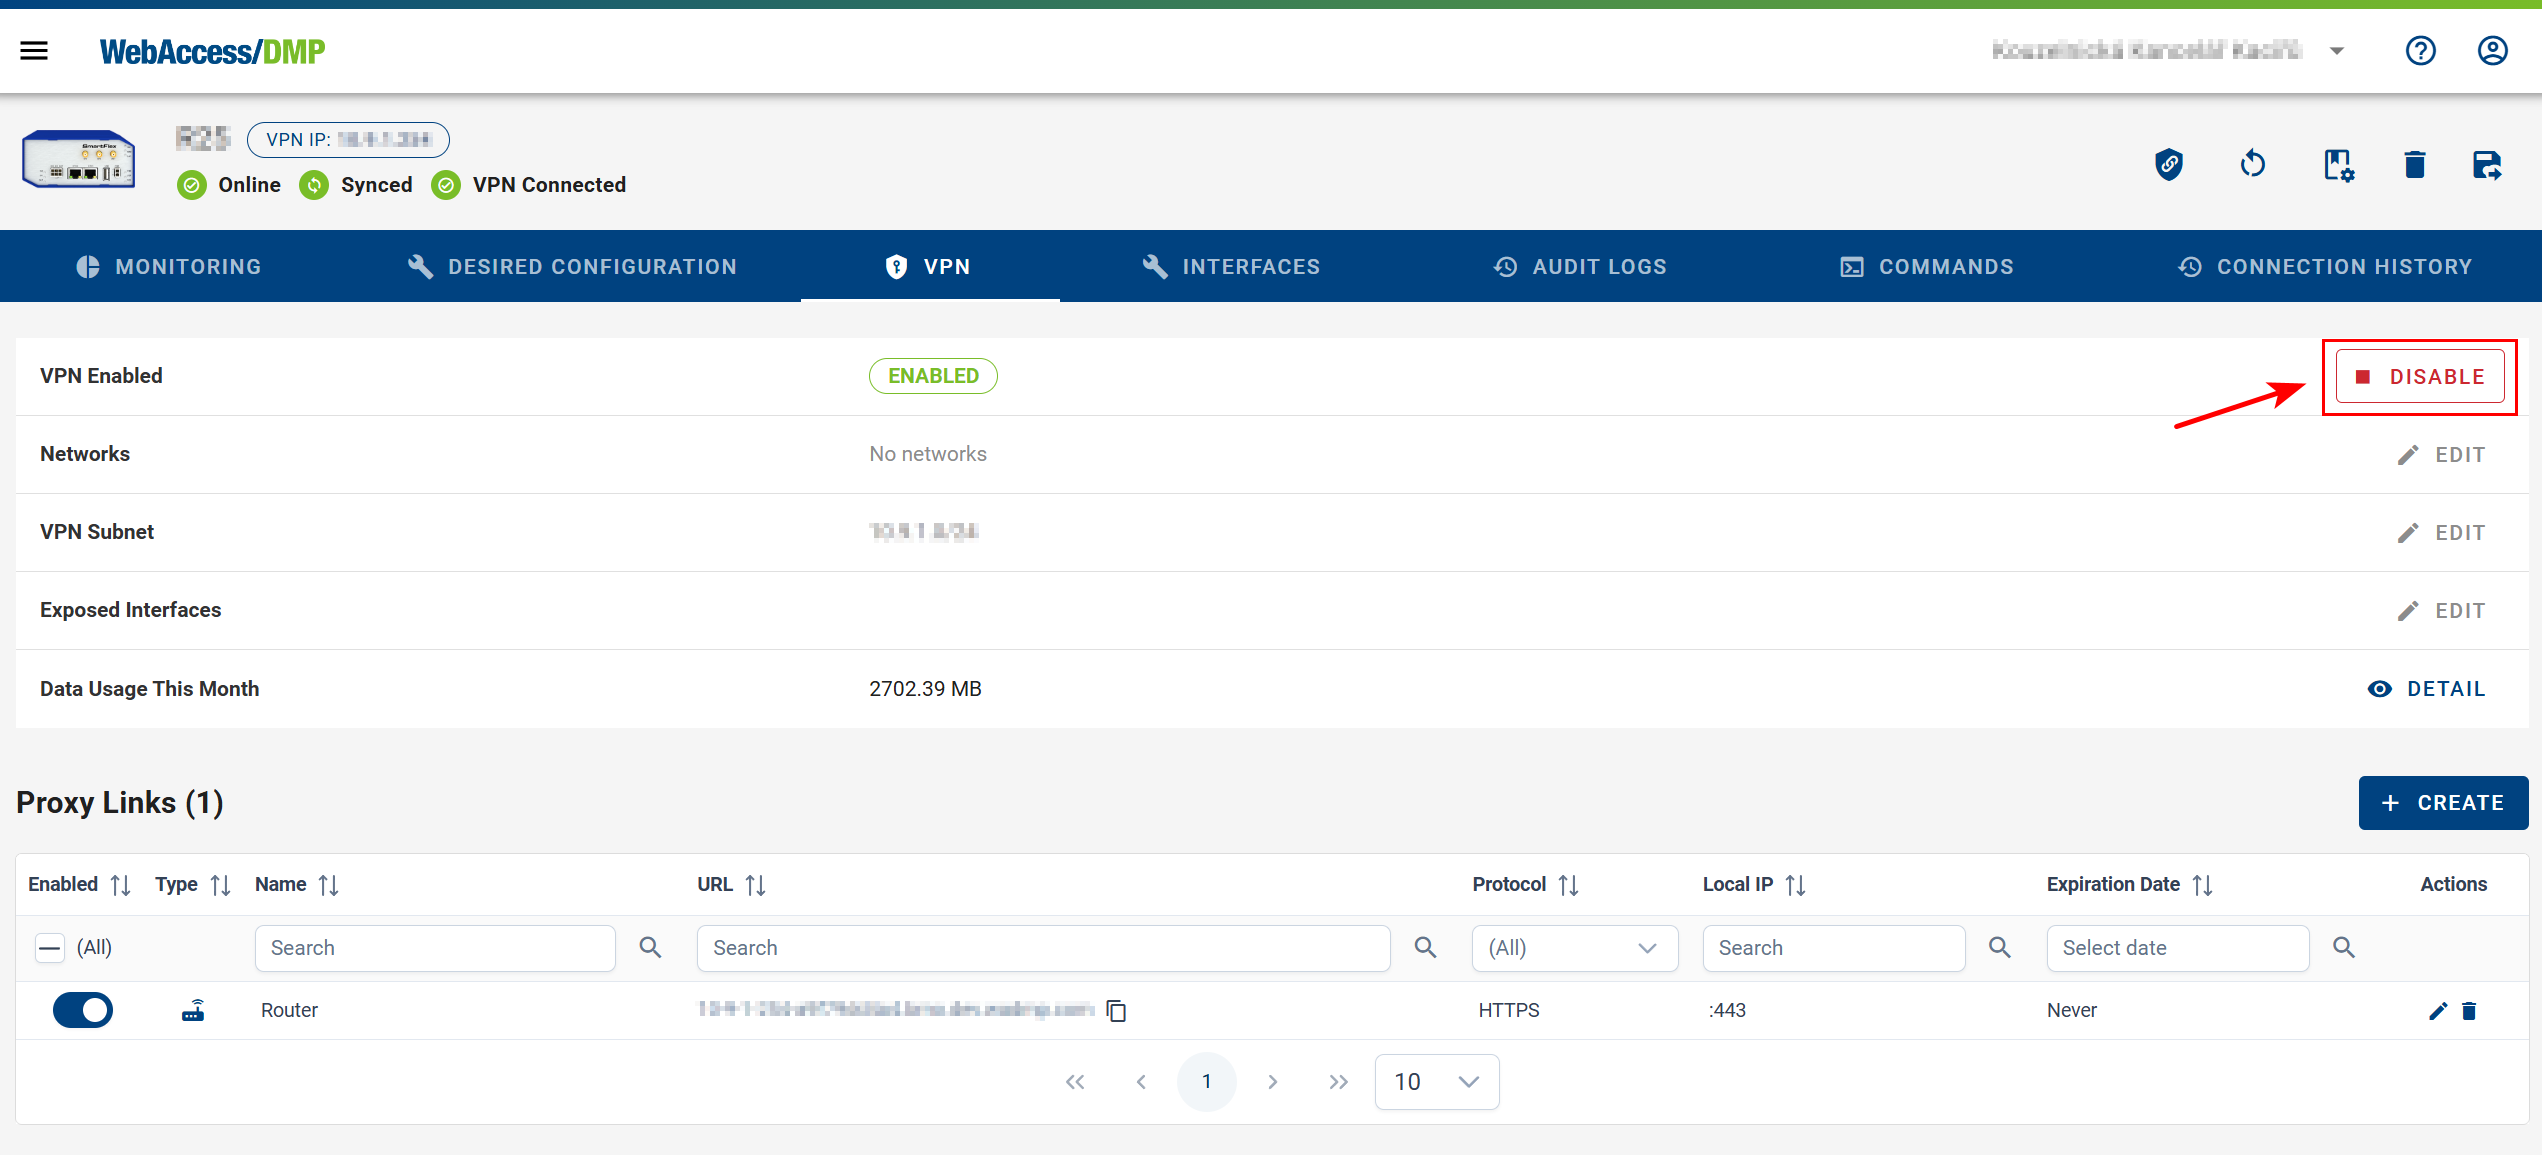
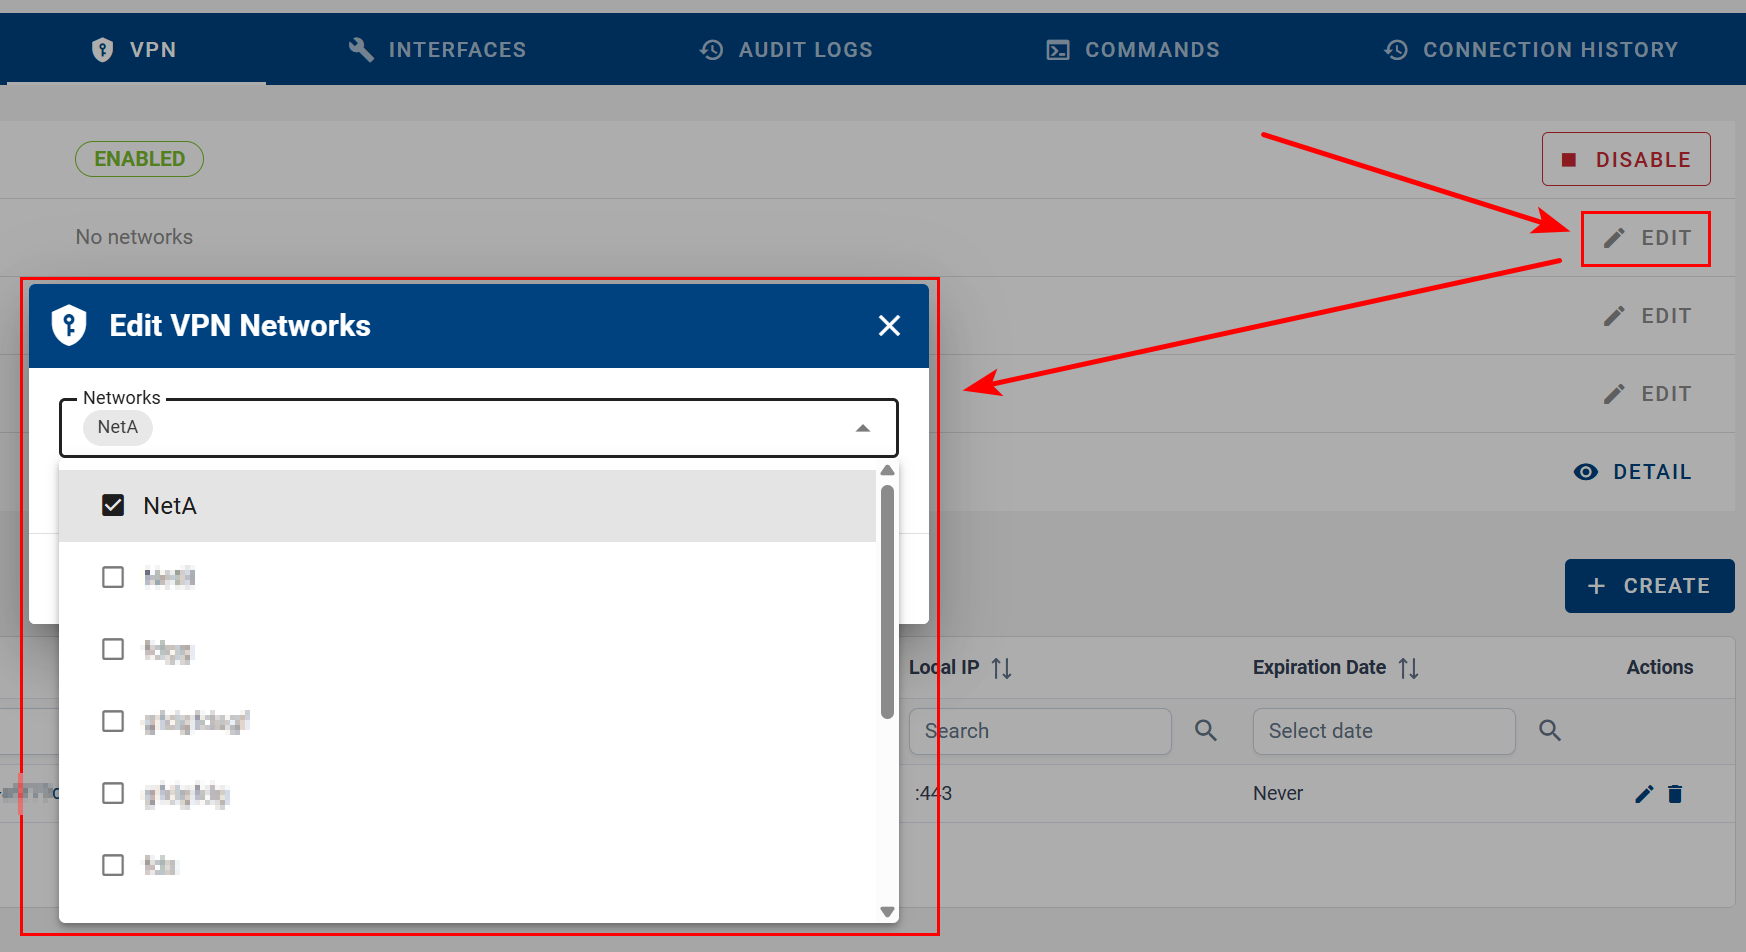
- Networks
Add or remove the device from VPN networks, controlling which devices can communicate with it.
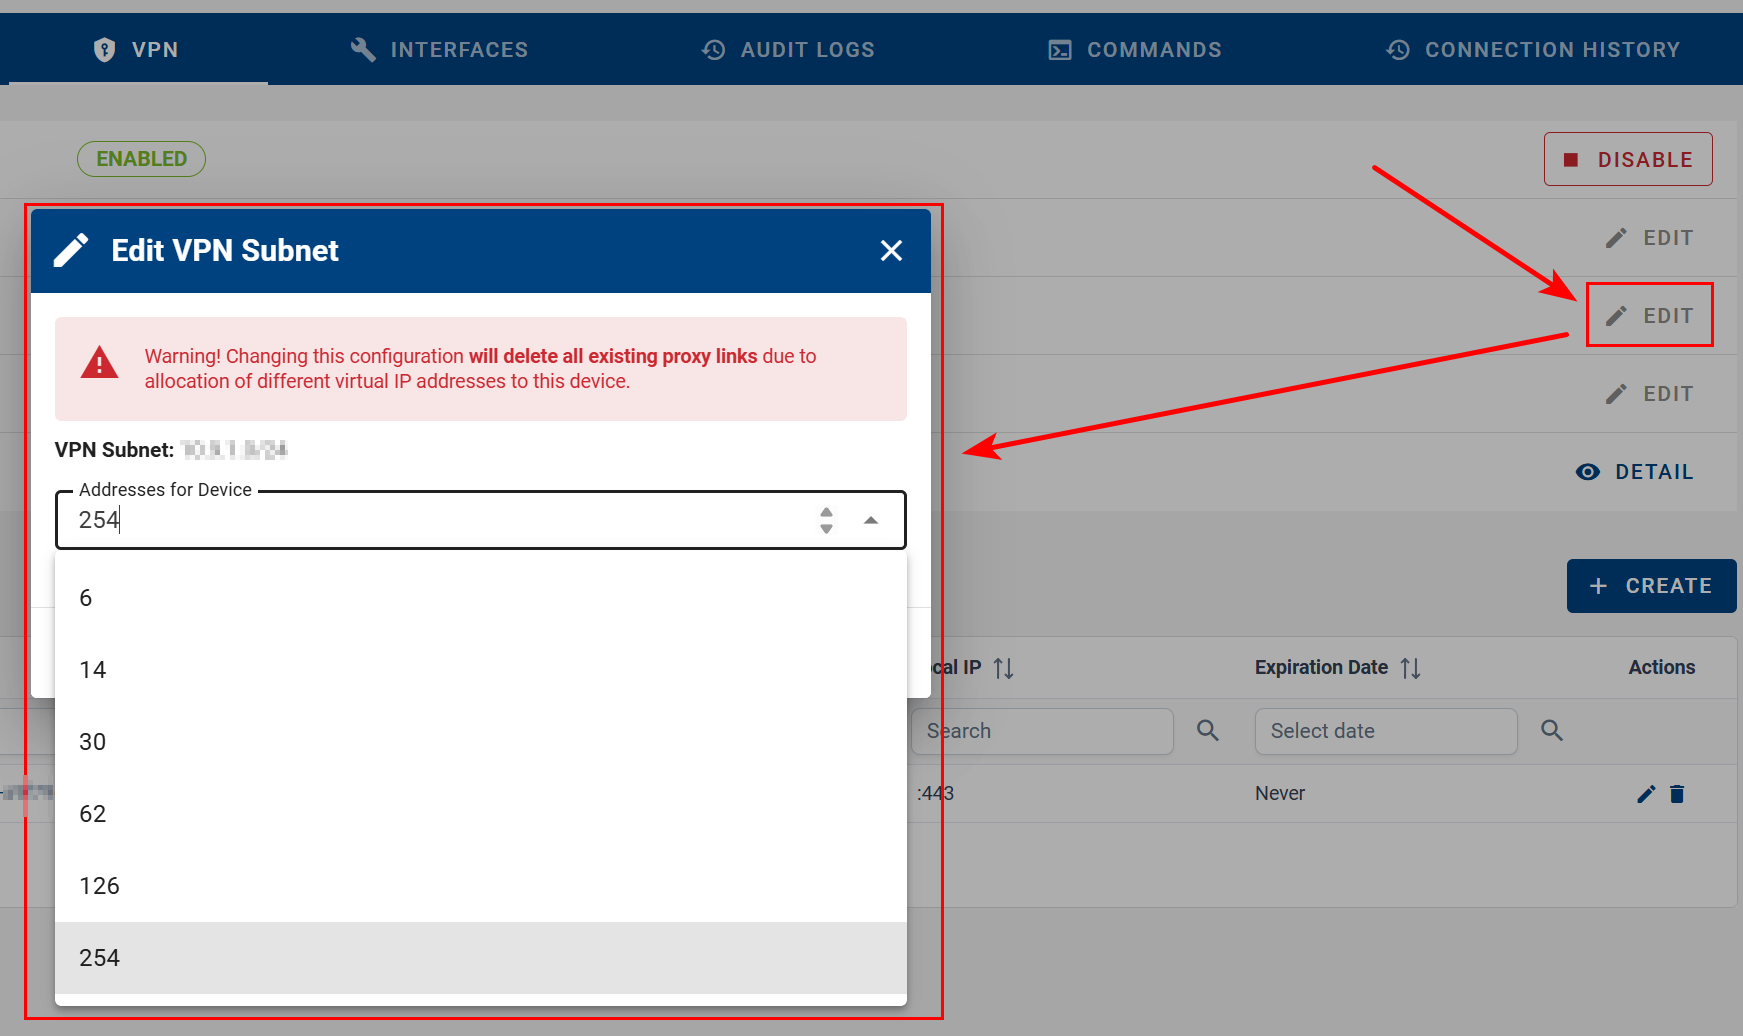
- VPN Subnet
Configure how many virtual IP addresses are assigned to the device.- Changing this setting reassigns IPs
- All existing Proxy links are removed
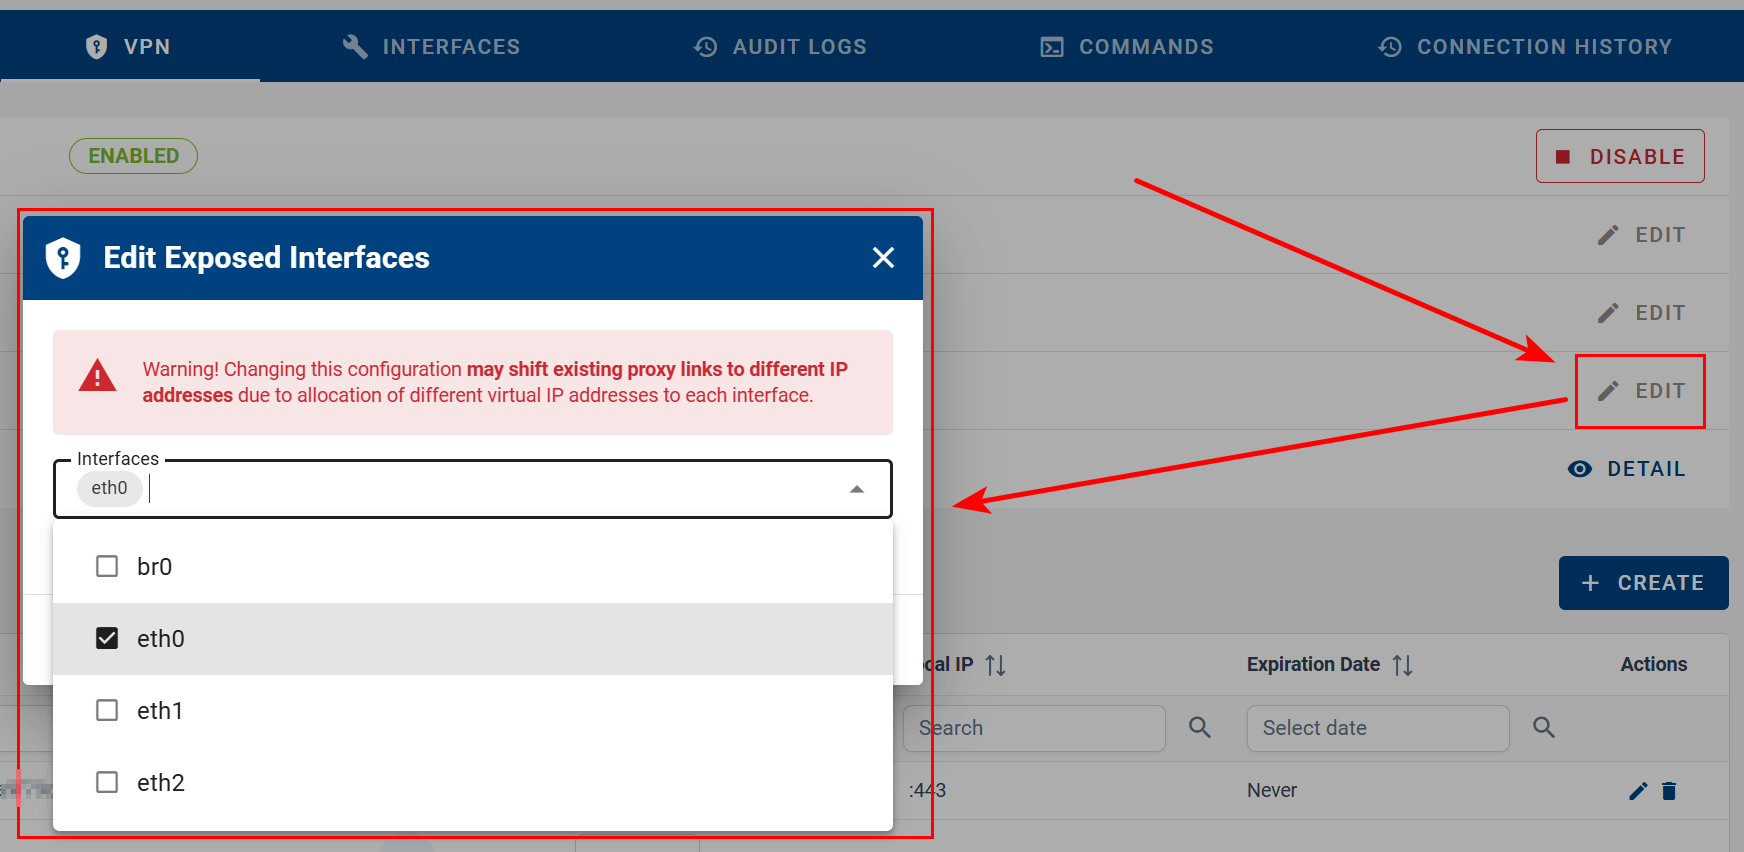
- Exposed Interfaces
Define which router interfaces are accessible over VPN.
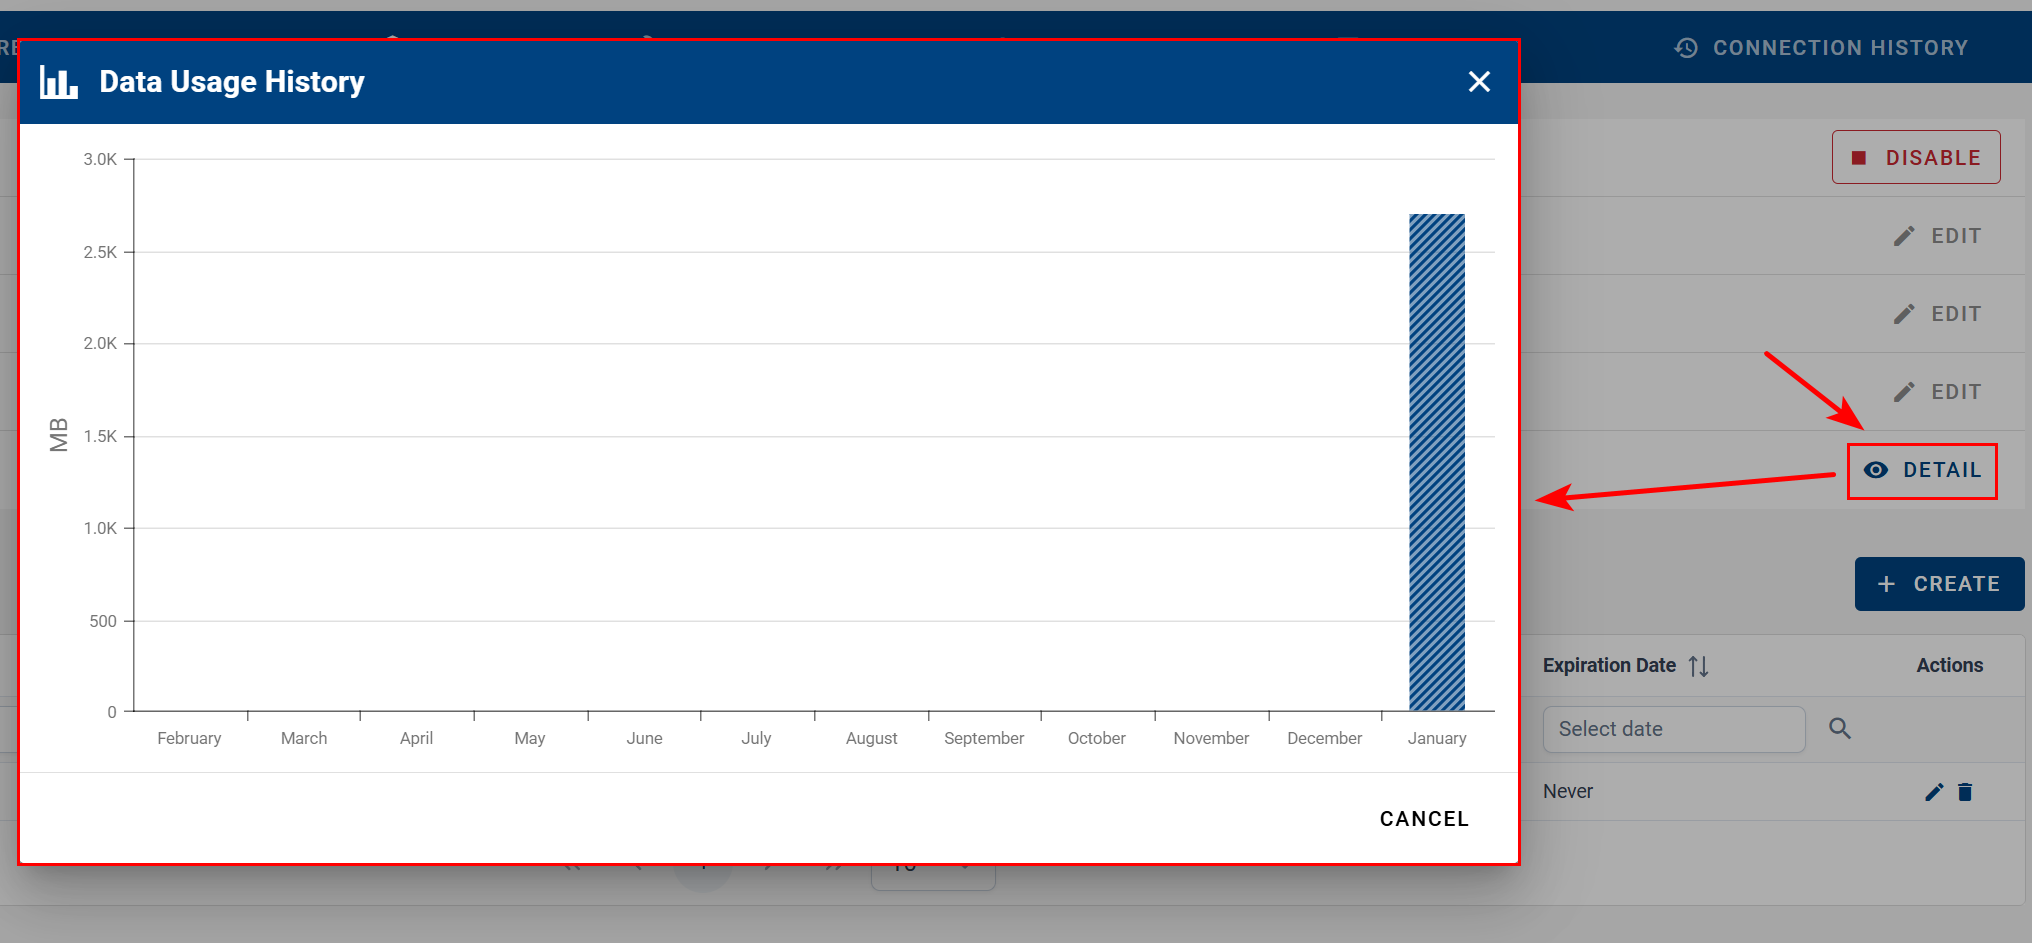
- Data Usage This Month
View the device’s VPN data usage history.
Proxy Links

Enable or disable the Proxy link using the toggle switch.
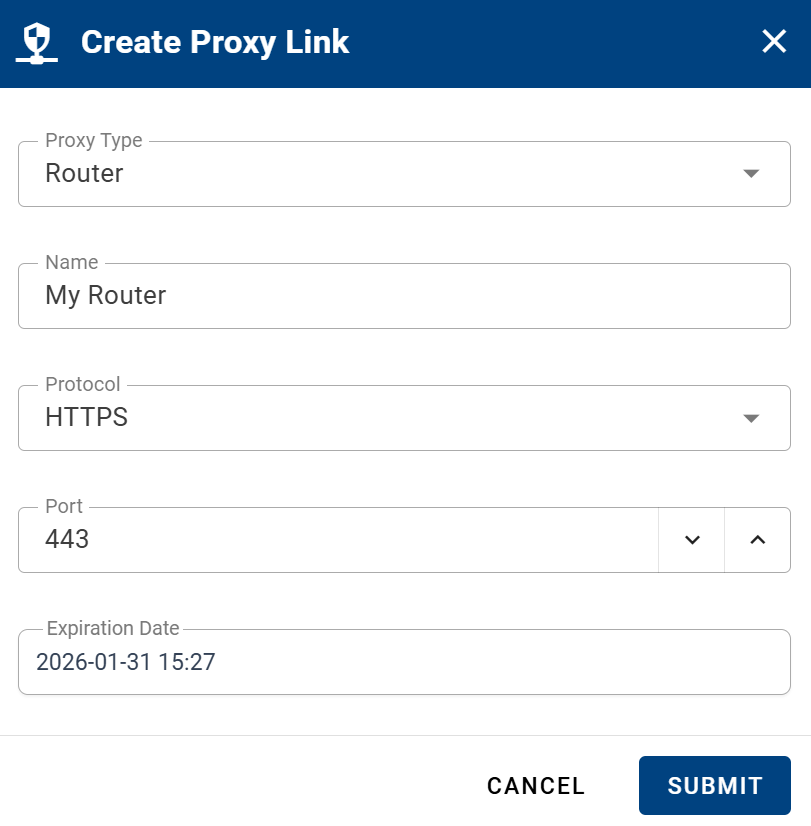
Disabling a Proxy does not delete it.Add additional Proxy links by specifying:
- Proxy Type — Router or LAN Device
- Name — Proxy link name
- Protocol — HTTP or HTTPS
- Port — Target port
- Expiration Date — Automatically deletes the Proxy after expiration
This is useful when accessing a device with a web interface behind the router via VPN. You must know the local network address of the target device.
Note: Adding a Proxy link exposes the service to the Internet. The corresponding LAN interface is automatically exposed in the Interfaces section.
- Proxy links can be edited or deleted directly from the device.
Notes:
- Proxy configuration changes may take up to 3 minutes to propagate.
- File uploads through a VPN Proxy link are limited to 256 MB.
- Known Issue: Proxy links do not work with firmware versions 6.5.0 and 6.5.1. Please upgrade the firmware.
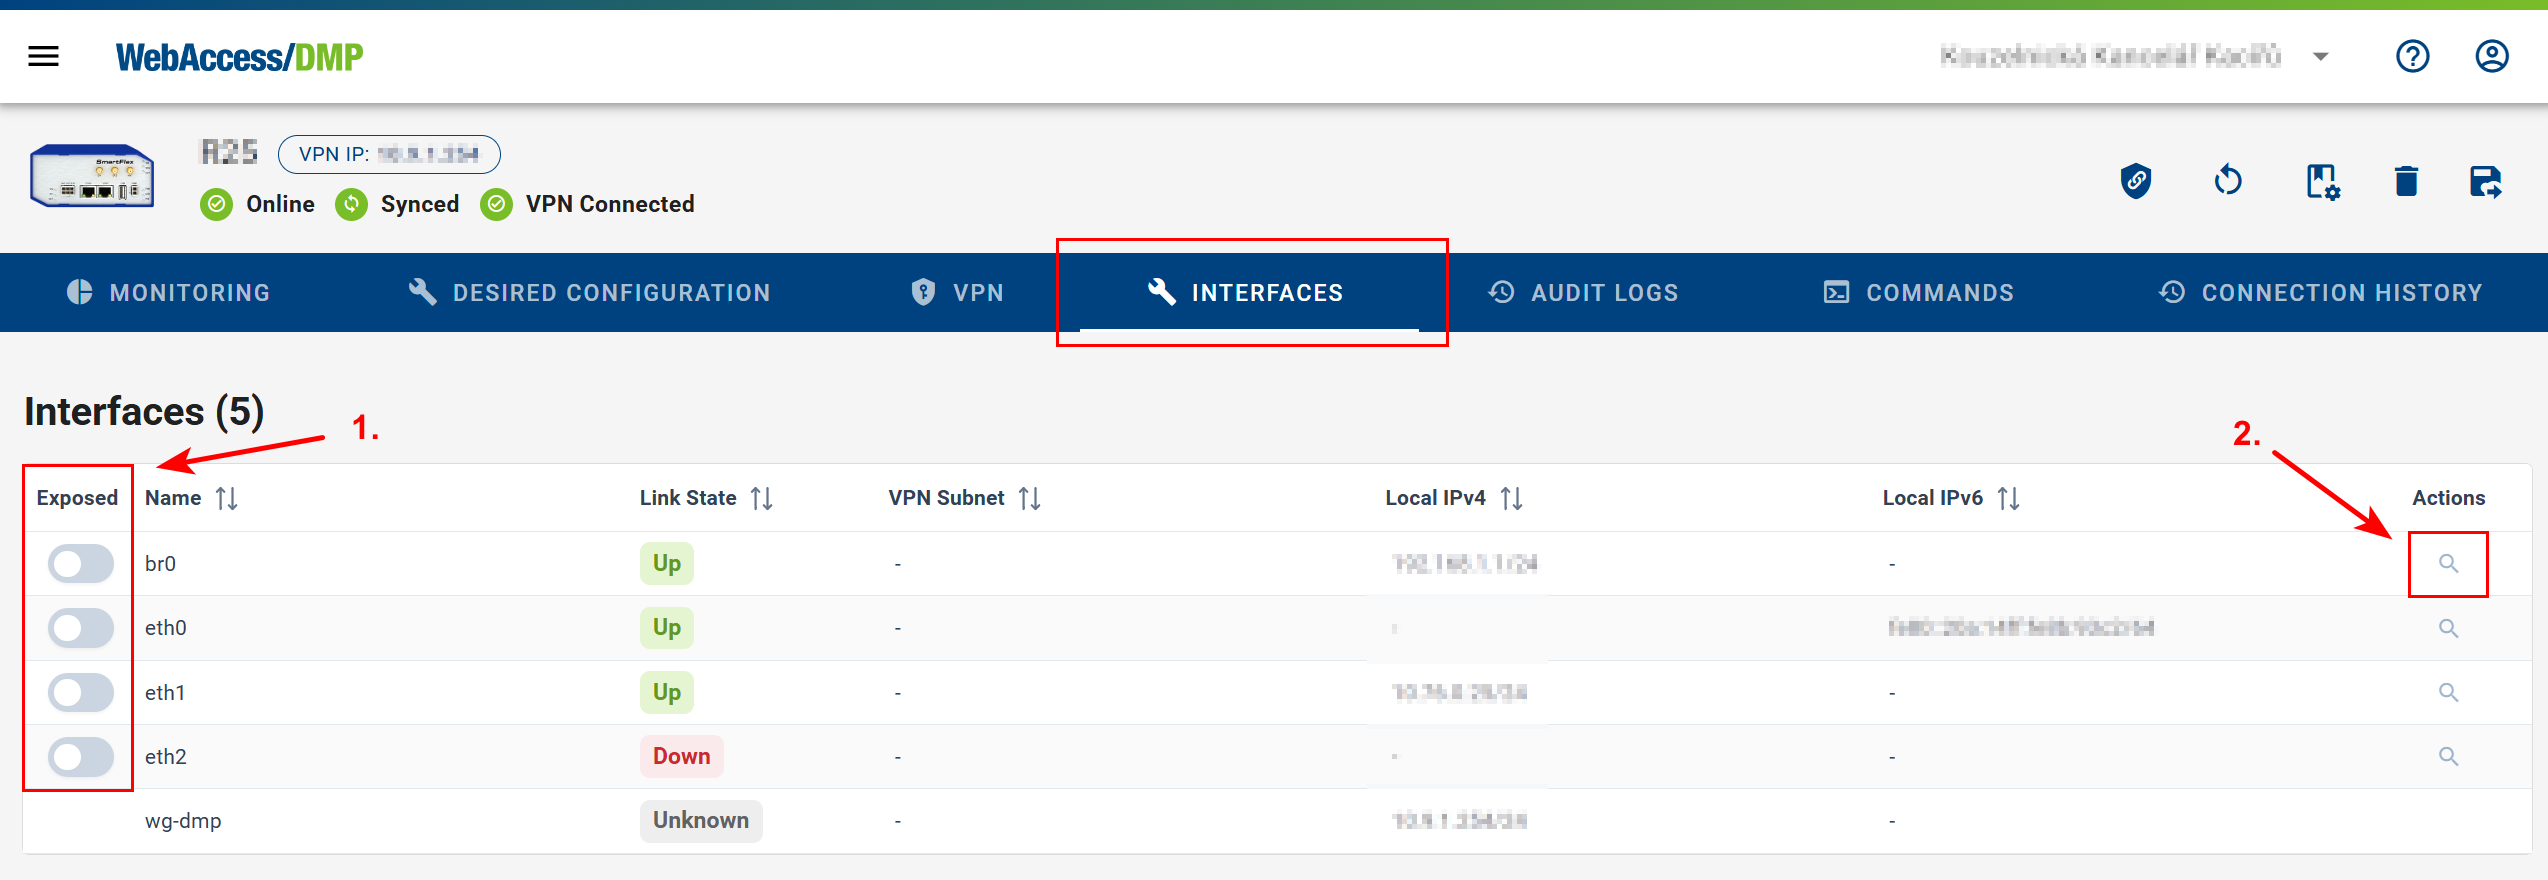
Interfaces
In the Interfaces section, you can:
- Expose or Unexpose an Interface
Disabling exposure blocks VPN traffic to devices behind the interface. VPN subnet changes may reassign Proxy link IP addresses.
- Access the Local Address Translator (NAT)
The interface must be exposed to access NAT configuration.

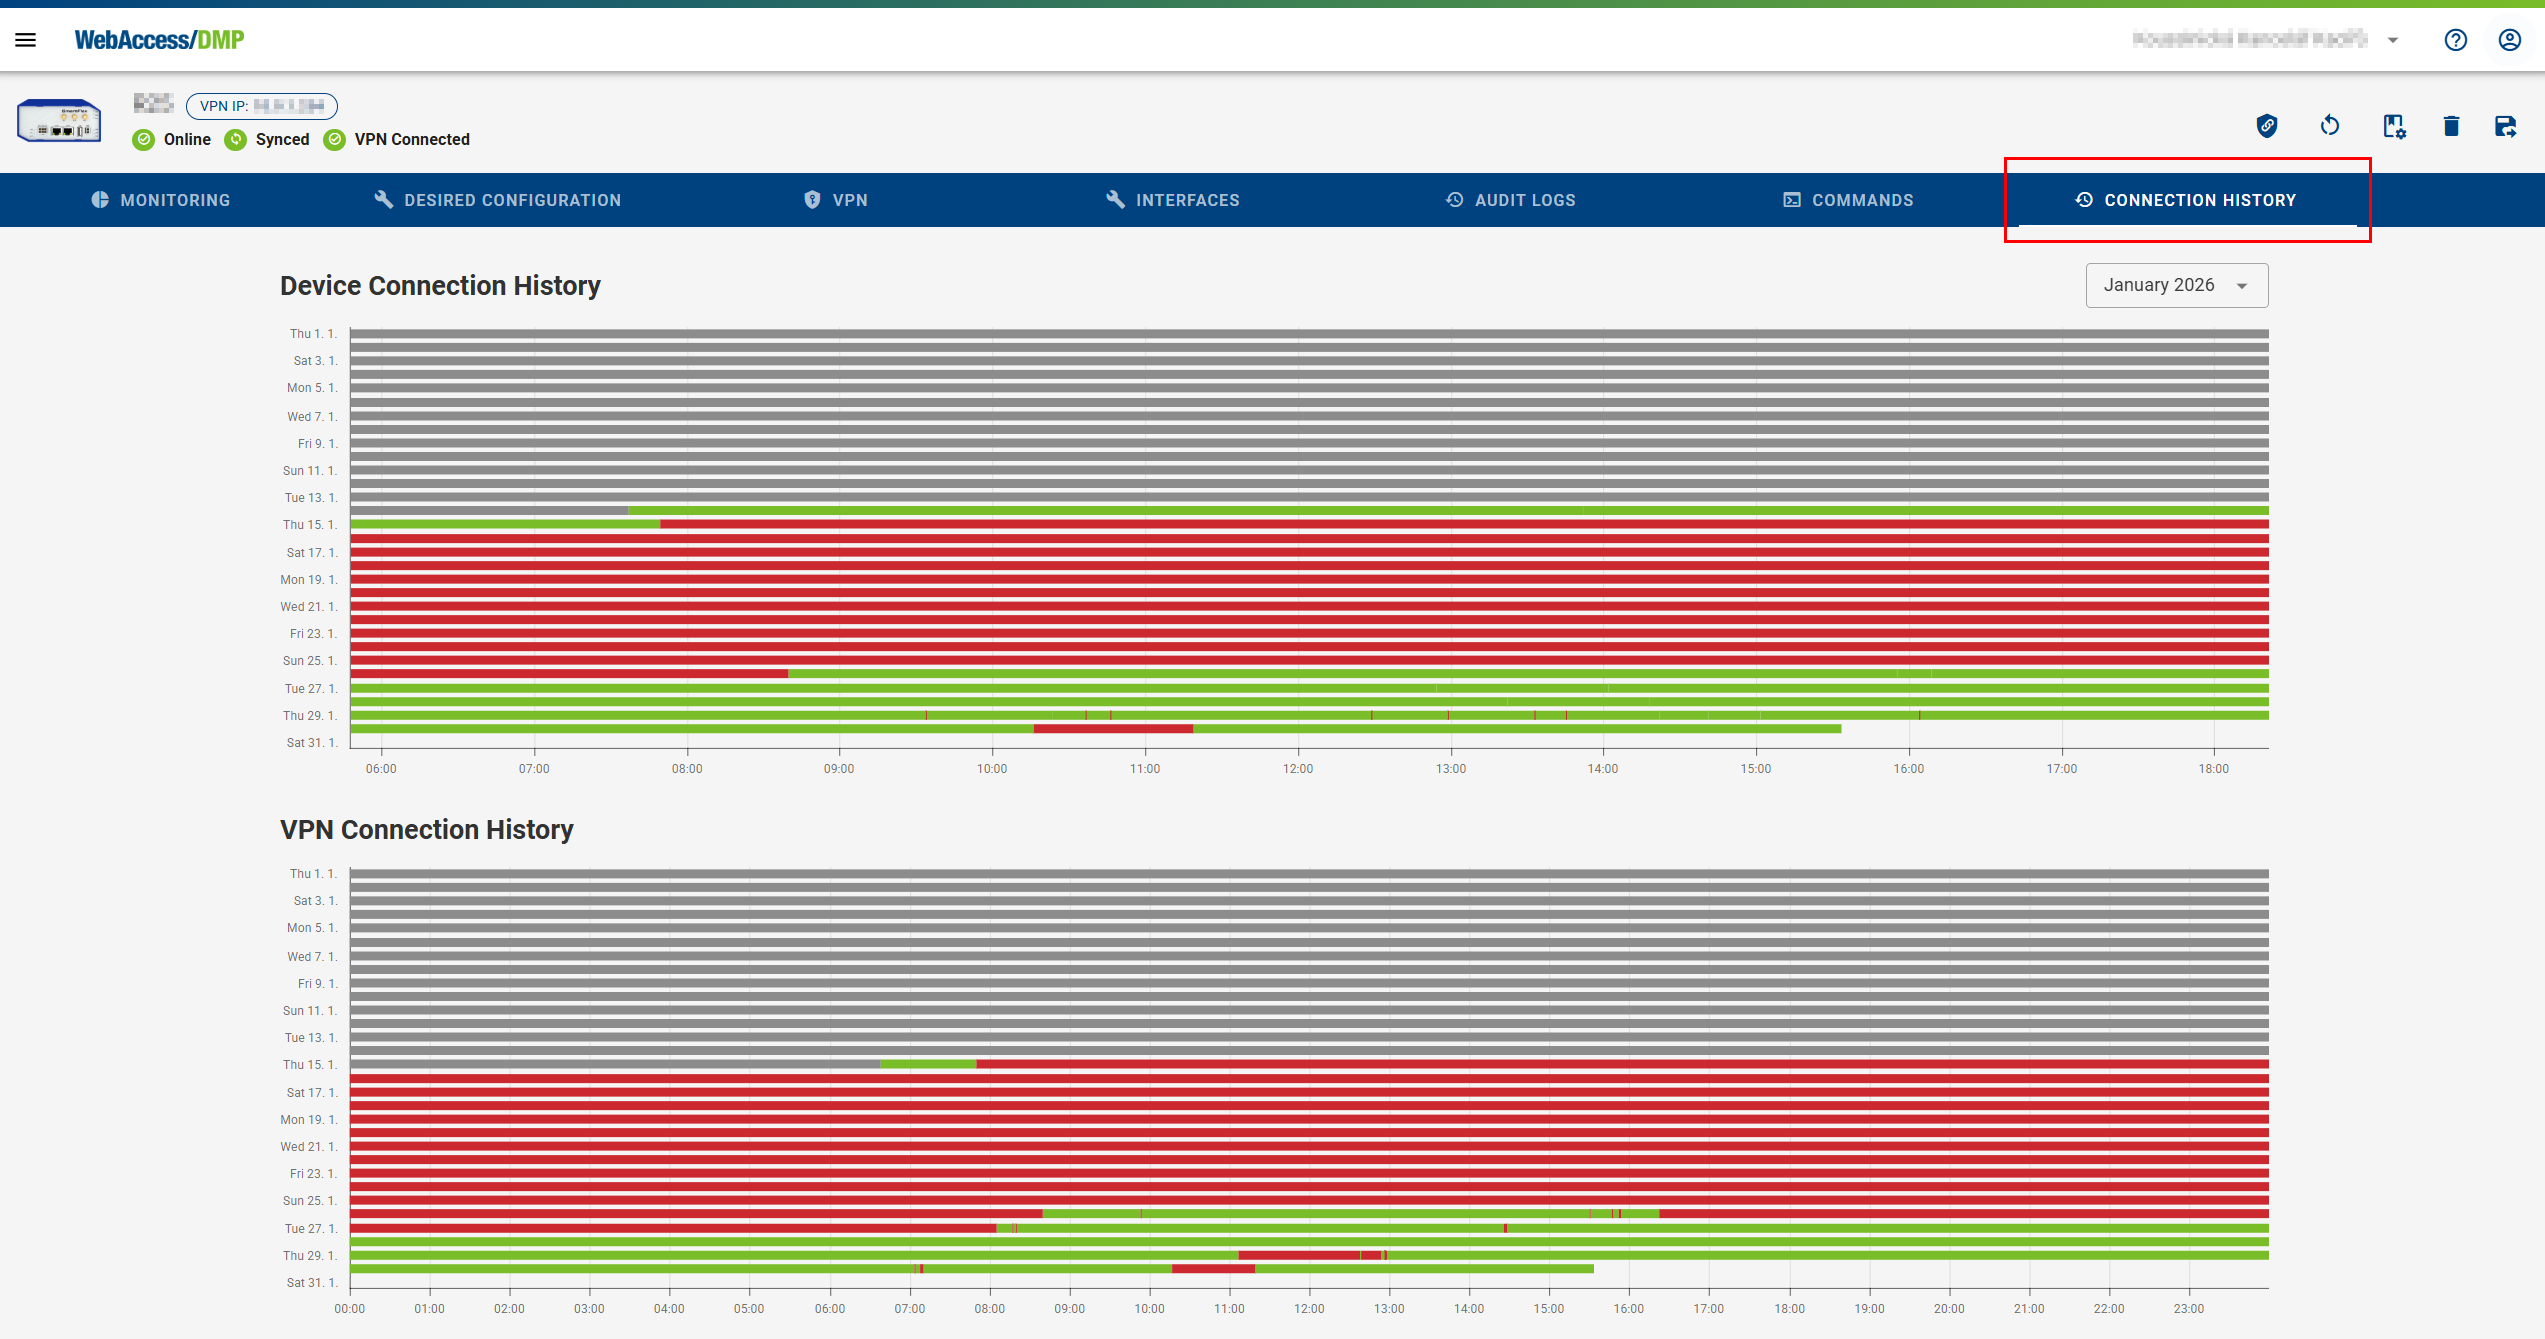
Connection History
In the Device Connection History section, you can:
- Track when the device connected or disconnected during the selected month
- View VPN connection events separately in the VPN Connection History